

To calibrate angle tools, first compare them with a known reference: a flat, level surface for 0 degrees, a precision square for 90 degrees, or angle blocks for other angles. Next, run the reversal test by turning the tool 180 degrees. If the two readings differ, adjust or recalibrate it, then write down the result.
An angle tool can look perfect and still read wrong. For example, a digital gauge that took one short fall, a speed square left on a hot dashboard, or a phone level app that was never set up can all be off by a few tenths of a degree. However, over a 4-foot board, half a degree moves the far end by about 0.42 inches (10.6 mm), which is enough to open a gap in a miter joint or tilt a shelf. That is why it pays to calibrate angle tools before they ruin a project.
The good news is that most shop and jobsite angle tools are easy to check at home. Every method uses the same idea: measure something whose angle you already know, then see whether the tool agrees. Flat and level gives you 0 degrees, a precision square gives you 90 degrees, and a sine bar or angle block gives you anything in between. Then the reversal test, where you turn the tool end for end, separates the tool’s own error from the slope of the surface. As a result, you can find an error as small as 0.1 degree with a flat table and a pencil.
In short: to calibrate angle tools, check each one against references you trust, flip it to catch hidden offsets, adjust it if the maker allows, and keep a simple log so you know when it starts to drift.
See What an Angle Error Means in Inches
Enter the error you found, in degrees. The converter then shows it as a percent grade and as a roof pitch. To turn the grade into a length, multiply it by 10 for millimeters per meter, or by 0.12 for inches per foot. For example, a 0.1 degree error is about a 0.17% grade, so it equals about 1.75 mm per meter or 0.021 inches per foot.
Because the offset grows with length, the same error matters more on long work. A 0.2 degree error is about 0.04 inches over a foot. Over an 8-foot wall, however, it becomes about 0.34 inches (8.5 mm).
Recommended Tools to Calibrate Angle Tools
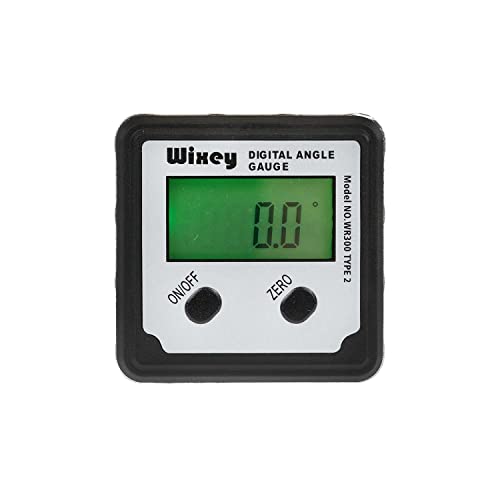
To calibrate angle tools well, you need two kinds of tools: the angle tools you use every day, and at least one reference you trust more than them. For the first group, a digital angle gauge and a digital protractor cover most saw setup and layout work. For the second, a precision machinist square gives you a known 90 degrees, and a small square set lets you check tools of different sizes. Also look for squares that list a squareness spec, such as “within 0.0005 inch” or a DIN or BS grade, because that number is what makes them a reference.



As an Amazon Associate, Measuring Expert earns from qualifying purchases.
- Every check compares the tool with a known angle: 0, 90 or a value from a sine bar or angle block.
- The reversal test (turn the tool 180 degrees) shows the tool’s own error, even on a surface that is not quite level.
- With unsigned readings, half the difference between the two readings is the tool’s error.
- Pressing “zero” on a gauge sets a relative reference; it is not the same as calibrating it.
- A 0.1 degree error equals about 1/48 inch per foot, or 1.75 mm per meter.
- Check tools after any drop, before critical work, and on a regular schedule you write down.
- For certified or safety-critical work, send tools to an accredited calibration lab.
Calibration, Zeroing and Verification Are Not the Same
Calibration also has a formal side. The US National Institute of Standards and Technology (NIST) describes metrological traceability as an unbroken, documented chain of calibrations that links a result back to a reference. In other words, your square is only as trustworthy as whatever it was last checked against. So a home check proves the tool agrees with your reference, while a lab certificate proves the reference itself.
People use these words as if they mean one thing. In practice, they describe different jobs, and mixing them up is the most common reason a “calibrated” tool still reads wrong.
| Term | What it really means | Example |
|---|---|---|
| Verification (check) | Comparing the tool with a known reference and recording the difference. Nothing gets changed. | Laying a protractor on a precision square and noting that it reads 90.5 degrees. |
| Calibration | Measuring the tool’s error against a traceable reference and, on most digital tools, storing a correction in the tool. | The two-position routine on a digital level, done on a flat reference surface. |
| Adjustment | Physically changing the tool so its error gets smaller. | Tapping a square’s blade or turning a level’s vial screw. |
| Zeroing (relative mode) | Telling the tool to treat its current position as 0. It measures from that surface, not from true level. | Pressing the zero key on a table saw top before setting the blade. |
For example, the manual for the General Tools model 824 digital angle detector explains that its calibrate button zeros the display on a reference surface and switches it to relative measurement. That is very useful for saw setup. Still, it does not prove the tool reads true level correctly.
How to Calibrate Angle Tools Step by Step (Digital Gauges)
When you calibrate angle tools with a display, the job is mostly the same. In fact, most digital levels and angle gauges use a two-position routine. The exact button presses vary by model, so keep the manual nearby. The method below follows the common pattern.
- Clean the tool and the surface. Wipe the base and the reference surface with a soft cloth, because a single crumb can tilt a short gauge by a tenth of a degree.
- Let it settle to room temperature. Bring the tool inside for at least 30 minutes if it has been in a cold truck or in the sun.
- Pick a flat, close-to-level reference. A machined cast-iron saw table, a granite surface plate or a thick glass shelf works well.
- Mark the spot. Trace around the gauge with a pencil, since the second reading must come from the exact same spot.
- Take the first reading. Set the gauge down, wait about 10 seconds for it to settle, and write the number down.
- Turn it 180 degrees. Rotate the gauge end for end inside the pencil outline and take the second reading.
- Compare the two numbers. Readings that match mean the tool is fine. Otherwise, half the difference is the tool’s error, and the average is the slope of the surface.
- Run the maker’s calibration routine. Enter calibration mode, take the readings at both positions as the manual describes, and let the tool store the correction.
- Verify and record. Repeat the reversal test. Then log the date, both readings and the result.
What Counts as a Pass When You Calibrate Angle Tools
Johnson Level’s manual for its 28-inch and 48-inch digital levels gives a good benchmark. It lists accuracy as plus or minus 0.1 degree at 0 and 90 degrees and plus or minus 0.2 degree at other angles. It also says the user should verify calibration before each use and recalibrate if the two readings differ by more than 0.2 degree.
Ways to Calibrate Angle Tools by Type
You cannot calibrate angle tools of every type with a button. Instead, many analog tools can only be checked, and then either adjusted, used with a known offset, or replaced. The table sums up the usual check for each one.
| Tool | How to check it | If it is off |
|---|---|---|
| Digital angle gauge or digital level | Reversal test on a flat surface; repeat on a vertical surface for 90 degrees | Run the built-in calibration routine |
| Spirit level (bubble level) | Read the bubble, turn the level end for end on the same spot, read again | Adjust the vial if it has screws; otherwise replace the level |
| Combination or framing square | Draw a line along the blade, flip the square over, draw again from the same edge | Peen or file it to correct, or buy a better square |
| Protractor (plastic or steel) | Lay it on a precision square for 90 degrees and a straightedge for 0 and 180 | Note the offset or replace it; most cannot be adjusted |
| Digital protractor or bevel gauge | Close the arms on a flat bar for 0; open them against a precision square for 90 | Reset zero per the manual; check 90 again |
| Phone level app | Reversal test on a flat surface, with the case off | Use the app’s calibrate option, then test again |
The Square Flip Test and Phone Apps
The square flip test deserves a closer look. Any gap between the two pencil lines is twice the real error, because flipping the square doubles it. So a gap of 1/32 inch at the end of a 12-inch blade means the square is out by about 1/64 inch over that length. That works out to roughly 0.07 degrees.
Phone apps also need special care. Cases, camera bumps and buttons can tilt a phone on a surface. For that reason, check the app with the case removed, and see our guide to measuring angles with a smartphone app for setup tips.
Reference Standards: Squares, Sine Bars and Angle Blocks
A check is only as good as its reference. So before you calibrate angle tools, decide what you will compare them with. Fortunately, three references cover almost every home and shop need.
First, a precision machinist square gives you 90 degrees. Good ones state a squareness tolerance, for example 0.0005 inch over the blade length. Over a 4-inch blade, that equals about 0.007 degrees, which is far better than any digital gauge can read.
Next, a sine bar gives you any angle you need. It is a precision bar with two rollers set an exact distance apart, usually 5 or 10 inches. You lift one roller on a stack of gauge blocks, and the height equals the bar length times the sine of the angle you want.
| Angle | Block height, 5 in sine bar | Block height, 10 in sine bar |
|---|---|---|
| 15° | 1.2941 in | 2.5882 in |
| 30° | 2.5000 in | 5.0000 in |
| 45° | 3.5355 in | 7.0711 in |
| 60° | 4.3301 in | 8.6603 in |
Finally, angle gauge blocks are hardened steel blocks ground to set angles. You combine them, adding or subtracting, to build almost any angle. They are fast to use, but they cost more than a sine bar.
No reference at all? Then a 3-4-5 triangle measured with a good tape still gives you a true right angle. Its other two angles are about 36.87 and 53.13 degrees. In addition, our guide to measuring angles without a protractor shows how to build other reference angles from lengths.
How Often Should You Calibrate Angle Tools?
There is no single rule. Instead, base the schedule on how the tool is used and what an error would cost. As a starting point:
- Before critical work: run a quick reversal test before setting a saw for a large batch of cuts, or before leveling a long run of cabinets.
- After any drop or hard knock: check it right away, even if it looks fine.
- Once a month for tools in daily professional use, and every few months for hobby tools.
- Once a year at an accredited lab, if your work needs a certificate.
Keep a simple log for each tool, with the date, the reference used, both readings and the action taken. Over time, the log shows whether a tool drifts slowly or holds steady. As a result, you can calibrate angle tools that stay stable less often. You can stretch the interval for stable tools and shorten it for the ones that wander.
Do and Don’t When You Check Angle Tools
Do
- Clean the base and the reference surface first.
- Mark the spot so both readings come from the same place.
- Let the tool reach room temperature.
- Write every result down, even a pass.
- Store tools in their cases, away from heat.
Don’t
- Treat the zero button as a full calibration.
- Check a tool against another tool of the same quality.
- Calibrate on a painted, warped or dusty surface.
- Ignore a drop because the display still works.
- Expect a 1-degree scale to show tenths.
Honest Limits of DIY Angle Checks
When you calibrate angle tools at home, you can usually get within about 0.1 degree. Even so, a home check has a ceiling. To begin with, the reversal test only finds the tool’s offset at the angle you tested. A gauge can be perfect at 0 degrees and still read 0.2 degrees off at 45. That is why the Johnson spec above is looser at other angles than at 0 and 90.
Also, the tool’s display limits what you can see. A gauge that shows 0.1 degree steps cannot reveal an error of 0.04 degrees. Similarly, your reference sets a floor. A cheap square that is itself out by 0.1 degree will “prove” that a bad tool is fine. Lastly, without a certificate there is no traceability, so your check cannot stand in for a formal calibration in audits or contracts.
When to Call a Calibration Lab
For most woodworking, home repair and hobby work, the checks above are enough. However, call an accredited calibration lab in these cases:
- Your customer, contract or quality system asks for a calibration certificate.
- You work in machining, aerospace, automotive alignment or surveying, where tolerances run well under 0.1 degree.
- The tool fails the reversal test and has no user calibration routine.
- You need to know the error at several angles, not just 0 and 90.
Look for a lab accredited to ISO/IEC 17025 for angle or dimensional work. The certificate should list the reference used, the measured errors and the uncertainty. For tilt and slope instruments such as a clinometer, ask whether the lab covers the full range you use.
Frequently Asked Questions
How do you calibrate angle tools at home?
Compare the tool with a known reference, such as a flat surface for 0 degrees or a precision square for 90 degrees. Then turn the tool 180 degrees and read it again. If the readings differ, run the maker’s calibration routine or adjust the tool.
How do you calibrate a digital angle finder?
Place it on a clean, flat surface, take a reading, then turn it end for end on the same spot and read again. Next, follow the manual’s calibration mode, which usually stores readings in both positions. Finally, repeat the test to confirm.
Is zeroing an angle gauge the same as calibrating it?
No. Zeroing sets the current surface as 0 so the gauge measures relative to it. Calibration checks the gauge against a trusted reference and corrects its own error.
How accurate are digital angle gauges?
Many common models show 0.1 degree steps. Some makers list accuracy of plus or minus 0.1 degree at 0 and 90 degrees and plus or minus 0.2 degree at other angles. Always check the spec for your model.
How often should you calibrate angle tools?
Check them before critical work and after any drop. As a routine, test daily-use tools about once a month and hobby tools every few months. Send them to a lab yearly if you need a certificate.
How do I check if my square is accurate?
Hold the stock against a straight edge and draw a line along the blade. Then flip the square over and draw a second line from the same point. Any gap between the lines is twice the square’s error.
How do you check a spirit level?
Set it on a nearly level surface and note where the bubble sits. Then turn it end for end on the same spot. If the bubble moves to a different position, the vial is off and needs adjustment or replacement.
What reference can I use to calibrate angle tools?
A precision machinist square gives 90 degrees, a flat machined surface gives 0 degrees, and a sine bar with gauge blocks or a set of angle blocks gives other angles. A 3-4-5 triangle also makes a true right angle.
Can I calibrate a phone level app?
Yes. Remove the case, place the phone on a flat surface and use the app’s calibrate option. Then run a reversal test by turning the phone 180 degrees to make sure both readings match.
When should I send angle tools to a calibration lab?
Use a lab when a contract or quality system needs a certificate, when tolerances are tighter than about 0.1 degree, or when a tool fails a check and cannot be recalibrated by the user.
Calibrate Angle Tools: The Bottom Line
To sum up, angle tools drift, get dropped and get zeroed on the wrong surface. Fortunately, the fix is simple: compare them with references you trust, use the reversal test to separate tool error from surface slope, and run the maker’s calibration routine when the numbers disagree.
So keep one good square and one flat surface for checks, log every result, and remember that small errors grow with length. Finally, for certificates or tight tolerances, a lab accredited to ISO/IEC 17025 is the right next step.
1 thought on “How to Calibrate Angle Tools for Accuracy: Simple Checks That Work”