


BIM measurement means reading lengths, areas and volumes straight from a 3D building model instead of measuring flat plans by hand. Because every model object stores its own dimensions, quantities update when the design changes. For example, a Stanford study of 32 projects found estimates accurate to within 3%.
Convert Dimensions for BIM Measurement
Model units are a common source of trouble, so check them first. Enter a length below, pick feet, inches or millimeters, and the converter shows the exact equivalents. It uses the exact definition 1 inch = 25.4 mm, so no rounding error creeps in.
Building Information Modeling (BIM) has changed how construction teams get numbers. Instead of scaling lengths off drawings, a team can ask the model for them. As a result, BIM measurement turns a design into counts, lengths, areas and volumes in minutes. However, the model is only as good as the data behind it, so this guide covers both the benefits and the limits.
Below, you will find a unit chart, a comparison with traditional takeoff, a worked example with real arithmetic, and a step list for checking a model against the job site. In addition, the FAQ answers the questions people search most often about BIM and measurement.
BIM Measurement Unit Conversion Chart
Models often mix imperial and metric inputs, so a conversion chart helps. Therefore, this chart lists the conversions that come up most often. Each value follows from the exact definition of the inch.
| US customary | Millimeters | Meters |
|---|---|---|
| 1/16 in | 1.59 mm | 0.0016 m |
| 1/8 in | 3.18 mm | 0.0032 m |
| 1/4 in | 6.35 mm | 0.0064 m |
| 1/2 in | 12.7 mm | 0.0127 m |
| 1 in | 25.4 mm | 0.0254 m |
| 1 ft (12 in) | 304.8 mm | 0.3048 m |
| 10 ft | 3,048 mm | 3.048 m |
| 100 ft | 30,480 mm | 30.48 m |
For exact factors and more examples, see our guide to imperial to metric construction conversions.
Recommended Tools to Check BIM Measurement in the Field
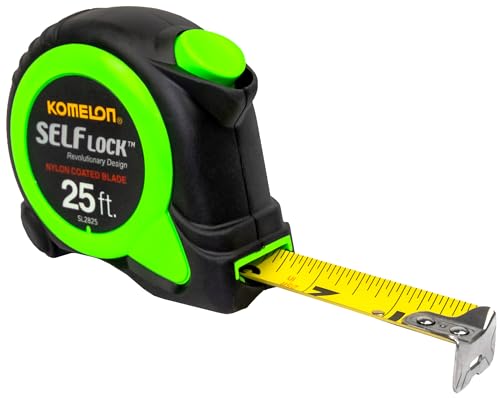
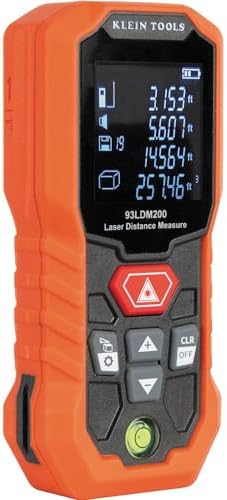
A model does not replace the job site. Instead, it tells you what the numbers should be, and a good tool tells you what they are. First, a laser distance measurer gives fast room dimensions to compare with the model. Next, a reliable steel tape settles small disputes and works when batteries die. Also, look for clear markings in both inches and millimeters when your project uses both.



As an Amazon Associate, Measuring Expert earns from qualifying purchases.
Key Takeaways
- BIM measurement pulls quantities from a 3D model, so a design change updates the numbers.
- Stanford research on 32 BIM projects reported cost estimates within 3%.
- Clash detection in the model is where much of the savings come from.
- A model is only as accurate as its inputs, so field checks still matter.
- Always confirm the model units; 1 in = 25.4 mm exactly.
- Add a waste factor to model quantities before you order materials.
- Use a licensed surveyor when a boundary or legal dimension is involved.
What BIM Measurement Actually Means
However, a BIM model is more than a 3D picture. Each wall, slab, beam and pipe is an object with data attached, including its length, area, volume and material. Therefore, BIM measurement is the practice of reading those stored values and using them for estimates, orders and checks.
The International Organization for Standardization describes the wider process in ISO 19650-1. That standard covers how teams exchange, record and organize building information across the whole life of an asset. In short, it gives everyone a shared way to handle model data, which is what makes the measurements trustworthy across a team.
For sharing models between programs, many teams use the open IFC format, standardized as ISO 16739. Because the format is open, an engineer and a contractor can read the same dimensions even when they use different software.
How a Model Becomes Quantities
The process is simple in principle. First, designers build the model with real sizes. Then, the software lists every object of a type, such as all concrete walls on level two. Finally, it adds up their lengths, areas or volumes into a schedule.
This list is called a quantity takeoff. In a paper workflow, an estimator scales each dimension off a drawing and keys it into a spreadsheet. With a model, the schedule updates when someone moves a wall. For example, lengthening a room by 2 ft changes the floor area, the drywall count and the paint estimate together.
Also, model detail matters here. A rough concept model may show a wall as one solid block. A detailed model shows studs, board layers and openings, so its quantities are closer to what the crew will build. Consequently, always ask what level of detail the model reached before you trust its numbers.
Benefits of BIM Measurement on a Real Project
The benefits fall into four groups. Each one links back to one idea: one shared model means one set of numbers.
- Fewer takeoff errors. Quantities come from the same objects that are drawn, so nobody re-types a dimension.
- Earlier clash detection. The software flags a duct that cuts through a beam before anyone pours concrete.
- Faster estimates. A schedule that took days to build by hand can refresh in minutes after a change.
- Better teamwork. Designers, estimators and site crews all read the same model, so fewer misunderstandings reach the site.
Research backs this up. A Stanford University group (the Center for Integrated Facilities Engineering) surveyed 32 BIM-assisted projects, as reported by Construction Executive. It found cost estimates accurate to within 3%, savings of up to 10% of contract value from timely clash detection, and time savings of up to 7%. Those are best-case reported figures from one survey, so treat them as a sign of potential, not a promise for your job.
BIM Measurement vs Traditional Takeoff
However, both methods still have a place. The table shows where each one is strong.
| Question | BIM measurement | Traditional takeoff |
|---|---|---|
| Source of numbers | Model objects with stored data | Scaled lengths read from drawings |
| Speed after a design change | Schedules refresh quickly | Re-measure and re-enter by hand |
| Typical error type | Wrong units or an incomplete model | Reading or typing mistakes |
| Needs software and training | Yes | Little beyond a scale rule |
| Checks the real building | No, it shows the design | No, it shows the drawing |
Still, neither method measures the finished building. For that, crews use tapes, lasers and scanners. Our comparison of laser scanning vs traditional measurement explains how scan data can be laid over a model to find differences.
Worked Example: Drywall and Concrete From Model Numbers
Next, here are two small examples with the arithmetic shown. Both use round numbers, so you can follow each step.
Drywall. Suppose the model reports one wall at 40 ft long and 9 ft high. The area is 40 x 9 = 360 sq ft, about 33.45 square meters, before you subtract doors and windows. A standard 4 ft by 8 ft sheet covers 32 sq ft. So 360 / 32 = 11.25 sheets. With a 10% waste allowance, you need 11.25 x 1.1 = 12.4 sheets, which rounds up to 13.
Concrete. Suppose a slab is 20 ft by 30 ft and 4 in thick. First, 4 in is 1/3 ft. Then 20 x 30 x (1/3) = 200 cubic feet. Since 1 cubic yard is 27 cubic feet, that is 7.41 cubic yards, or about 5.66 cubic meters. Ordering usually adds a small margin on top, so ask your supplier how much.
How to Set Up BIM Measurement Checks Step by Step
- Confirm the model units. Open the project settings and check whether the base unit is millimeters, feet or inches.
- Check the level of detail. Ask what each element includes, such as framing, finishes or only an outline.
- Generate a schedule. Create a quantity table for one element type, like walls or slabs, with length, area and volume columns.
- Spot-check by hand. Recompute one or two rows with a calculator, as in the worked example above.
- Compare with the site. Measure a few key dimensions on the job with a laser or tape and compare them with the model.
- Record differences. Log every mismatch, then update the model so the next schedule is correct.
Do and Don’t With Model Quantities
Do
- Verify the unit system before you read any number.
- Recompute a sample of rows by hand.
- Keep one version of the model as the source of truth.
- Record who changed which dimension, and when.
- Calibrate your field tools on a schedule.
Don’t
- Treat a concept-level model as a final order list.
- Mix inches and millimeters in one table without labels.
- Order materials with no waste allowance.
- Skip the site check because the model looks right.
- Use model dimensions as a legal boundary.
For tool checks, read about why measurement tools need calibration.
Honest Limits of BIM Measurement
BIM is a strong tool, yet it has limits. For one thing, a model shows the design, not the built result. For example, concrete can be poured a little off, and walls can end up slightly out of plumb. Moreover, a model with missing elements gives low quantities without any warning, because the software can only total what is drawn.
Small errors also add up. For instance, if 100 repeated parts are each 1/16 in too long, the total error is 6.25 in, or 158.75 mm. In short, a tiny tolerance matters when it repeats. Our article on construction measurement precision shows how this stacking works.
Finally, software and training take time and money, and small jobs may not repay them. Also, the benefit grows with project size and the number of trades involved.
When to Call a Professional
First, call a licensed land surveyor for property lines, setbacks and elevations. A total station and a trained operator establish those points, as covered in our guide on how to use a total station. Likewise, ask a structural engineer before you change any load-bearing dimension, and a BIM coordinator when models from several trades disagree.
Frequently Asked Questions
What is BIM measurement?
BIM measurement is the practice of reading lengths, areas, volumes and counts from the data stored in a 3D building model. Teams use it for estimates, material orders and design checks.
What are the benefits of BIM in construction?
The main benefits are fewer takeoff errors, early clash detection, faster estimates after changes and better coordination between trades. A Stanford survey of 32 projects reported estimates within 3% and savings of up to 10% of contract value.
Which is a key benefit of using BIM in construction projects?
A key benefit is that every team works from one shared model, so dimensions stay consistent. In addition, clashes between systems show up before construction starts.
How is BIM used in construction?
Teams use BIM to design, check clashes, produce quantity takeoffs, plan the schedule and later manage the finished building. Its data carries from design through operation.
How does BIM measurement help quantity surveyors?
It gives them model-based schedules of lengths, areas and volumes, so they spend less time scaling drawings. They still review the results, add waste and apply local measurement rules.
How accurate is BIM measurement?
It is as accurate as the model’s inputs and level of detail. Quantities are exact for the geometry drawn, but the built structure can differ, so field checks are still needed.
Do I still need a tape measure with BIM?
Yes. A tape or laser measurer confirms the real building against the model. Without those checks, differences between design and construction go unnoticed.
Does BIM measurement work in feet and inches?
Yes. Most software supports both imperial and metric units. Just confirm the project unit first, since 1 in = 25.4 mm exactly and a wrong setting skews every quantity.
What file format shares a BIM model between programs?
The open Industry Foundation Classes (IFC) format, standardized as ISO 16739, is widely used. It lets different programs read the same objects and dimensions.
What is ISO 19650?
ISO 19650 is a series of standards for managing information with BIM. Part 1 sets the concepts and principles for exchanging and organizing information across an asset’s life cycle.
BIM Measurement: The Bottom Line
To sum up, BIM measurement gives construction teams fast, consistent quantities because every number comes from one shared model. Reported studies show strong potential for accuracy and cost savings. However, those gains depend on correct units, a detailed model and honest field checks.
So start small. Use the converter at the top to confirm your units, recompute one schedule by hand, and compare a few dimensions on site with a laser or tape. Over time, those habits make the model a number source you can trust.