

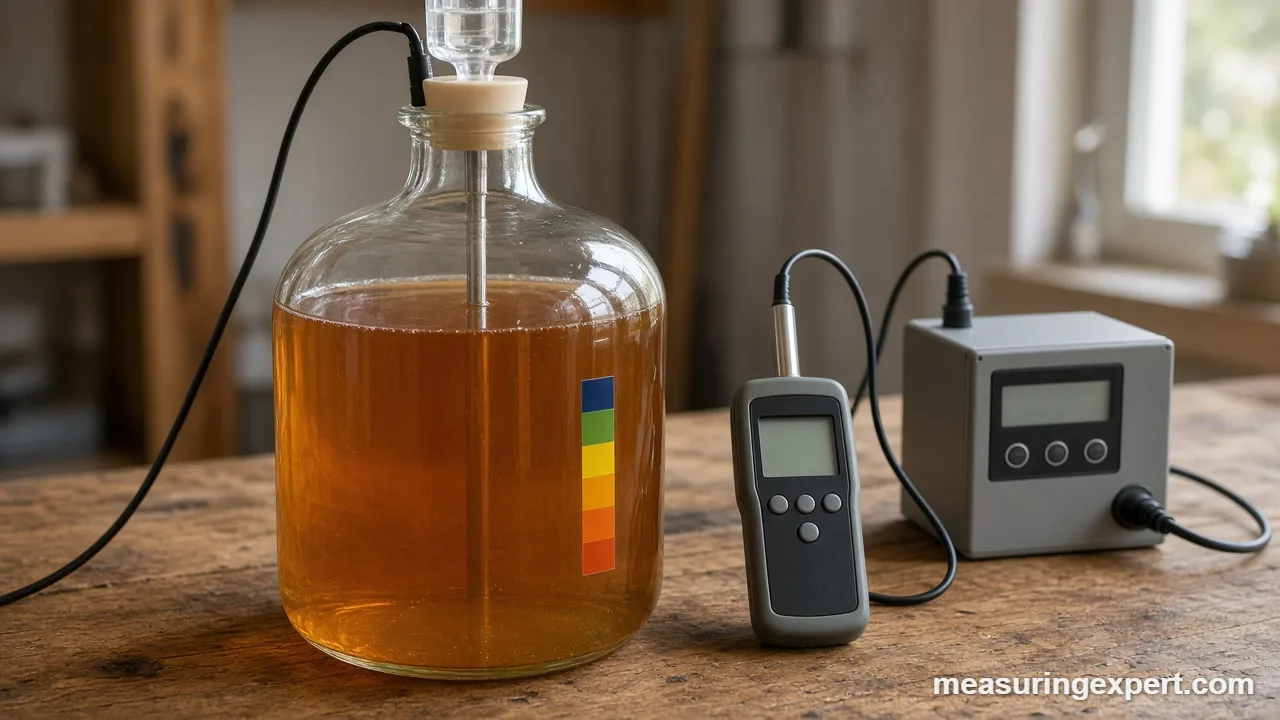
The best fermentation thermometer for most homebrewers is the Inkbird ITC-308, because its probe both reads the batch and switches a fridge or heater to hold your target. However, the right pick depends on whether you only need to watch the temperature, log it with gravity, or control it.
In short: control with the Inkbird ITC-308, log with a Tilt Pro, and stick a Bucha Brewers strip on every jar for a cheap glance.
As an Amazon Associate, Measuring Expert earns from qualifying purchases. Our picks are based on research, specifications and owner feedback, not paid placement.

Best Budget

Best Smart

Quick Answer: The Best Fermentation Thermometer for Each Job
- Hold a set temperature in a fridge or chamber: Inkbird ITC-308 with its probe in a thermowell.
- Log temperature and gravity from inside the beer: Tilt Pro, or the original Tilt for carboys.
- Check chilled wort before pitching: ThermoWorks Sizzle, or the Inkbird IHT-1P on a budget.
- Watch several kombucha jars cheaply: Bucha Brewers adhesive strips.
- Keep a cold-room batch warm: BN-LINK heat thermostat with a heat mat.
- Key fact: active fermentation can run 10 to 15 F (5.5 to 8.3 C) above the room, so measure the liquid when you can.
On This Page
- Comparison table
- The 8 picks, reviewed
- How we chose
- Strip, probe, dial or floating sensor
- Why the wall reads cooler than the beer
- Specs that matter
- Temperature targets and converter
- How to set up a probe and controller
- The ice-water accuracy check
- Do and Don’t
- Honest limits
- FAQ
- Bottom line
Fermentation Thermometer Comparison at a Glance
Each row links to the full review below.
| # | Product | Best For | Standout Feature | Amazon |
|---|---|---|---|---|
| 1 | Inkbird ITC-308 Temperature Controller | Fermentation chambers and chest freezers | Dual heat and cool outlets driven by one probe | View |
| 2 | Tilt Pro Wireless Hydrometer and Thermometer | Brewers who log every batch | 0.0001 gravity resolution and 0.1 F temperature readout | View |
| 3 | Tilt Wireless Hydrometer and Thermometer | Glass carboys and plastic buckets | Floating sensor with color-coded multi-batch support | View |
| 4 | ThermoWorks Sizzle Instant-Read Thermometer | Checking wort before you pitch yeast | +/-0.9 F accuracy with a NIST-traceable certificate | View |
| 5 | Bucha Brewers Adhesive Thermometer Strips (10-Pack) | Kombucha jars and spare fermenters | Ten liquid crystal strips for every vessel | View |
| 6 | BN-LINK Digital Heat Mat Thermostat | Kombucha and winter ales with a heat mat | Plug-in heat control from 40 to 108 F | View |
| 7 | MEASUREMAN Stainless Bimetal Dial Thermometer (6 in Stem) | Fermenters and kettles with a threaded port | 6 in stem with a 1/2 in NPT back mount | View |
| 8 | Inkbird IHT-1P Instant-Read Thermometer | Brew day spot checks on a budget | Rechargeable probe with read-hold and offset | View |
The 8 Best Fermentation Thermometer Picks, Reviewed
These picks mix three kinds of tools: controllers that hold a temperature, sensors that float in the beer, and simple gauges you read by eye. If you also track sugar and alcohol, pair them with a triple scale hydrometer or an alcohol refractometer.
Best Overall
1. Inkbird ITC-308 Temperature Controller
Best for: Homebrewers who ferment in a fridge, freezer or chamber and want the thermometer to hold the temperature, not just report it.
The Inkbird ITC-308 is our pick for the best fermentation thermometer setup because it reads and acts. First, its probe sits on the fermenter or inside a thermowell. Then the controller switches a fridge on one outlet and a heat wrap on the other, so the beer stays near your set point day and night.
On the measuring side, Inkbird lists accuracy of +/-2 F (+/-1 C) and 0.1 degree resolution below 100 degrees. In addition, a calibration offset lets you correct the probe after an ice-water check. A compressor delay also protects the fridge from short cycling, and high and low alarms warn you when a batch drifts.
- Control range: -58 to 248 F (-50 to 120 C)
- Accuracy: +/-2 F (+/-1 C); 0.1 degree display resolution below 100
- Two outlets: heating and cooling, with a compressor delay
- Temperature calibration offset plus high and low alarms
Pros
- Holds a set point instead of only showing a number
- Works with a thermowell or a taped-on probe
- Plug-in design needs no wiring
Cons
- Wider tolerance than the best digital probes
- No app or data log on this model
- You still need a fridge or heater to control
Skip it if: You ferment in a closet with no fridge or heater, because then a controller has nothing to switch.
Best Smart
2. Tilt Pro Wireless Hydrometer and Thermometer
Best for: Data-minded brewers who want temperature and gravity logged from inside the beer without opening the fermenter.
The Tilt Pro floats in the wort, so it measures the liquid itself rather than the outside wall. As a result, its readings show the heat that yeast produce during the busiest days. It also tracks specific gravity, so one device tells you when fermentation slows and when it ends.
Tilt lists +/-1 F (+/-0.5 C) temperature accuracy, 0.1 degree resolution and gravity accuracy of +/-0.002 within its 0.990 to 1.120 range. In addition, two AA lithium cells run it for an expected 3 to 5 years. Meanwhile, Bluetooth 5 sends data to a phone, a Tilt Pi or a cloud sheet.
- Temperature: 0 to 140 F (-17.8 to 60 C), +/-1 F (+/-0.5 C)
- Gravity: 0.990 to 1.120, +/-0.002, 0.0001 resolution
- Power: two replaceable AA lithium cells, 3 to 5 year life
- Size: 1.7 x 5.4 in (43 x 140 mm), 5.4 oz (153 g)
Pros
- Measures inside the liquid, not on the wall
- Logs gravity and temperature together
- Very long battery life
Cons
- Needs a phone, tablet or Tilt Pi in Bluetooth range
- Stainless fermenters can weaken the signal
- Costs far more than a strip or dial
Skip it if: You only want a quick look at the temperature, because a strip or dial does that for a fraction of the cost.
Best for Carboys
3. Tilt Wireless Hydrometer and Thermometer
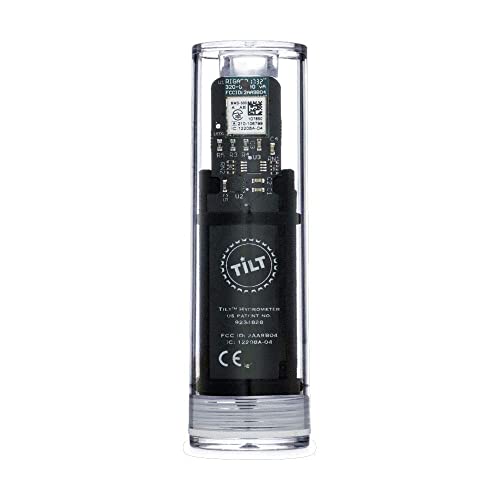
Best for: Homebrewers with glass carboys or plastic buckets who want the Tilt idea at a lower price than the Pro.
The original Tilt works like the Pro: it floats, tilts with gravity and reports wort temperature over Bluetooth. Also, each unit comes in a color, so you can run several batches at once as long as each Tilt has a different color.
Tilt rates it at +/-1 F (+/-0.5 C) and +/-0.002 gravity within 0.990 to 1.120. Meanwhile, the pre-installed battery lasts about 12 to 24 months, depending on use. So for most hobby brewers, it gives the same core readings as the Pro with a shorter battery life.
- Temperature accuracy: +/-1 F (+/-0.5 C)
- Gravity: 0.990 to 1.120, +/-0.002
- Battery: pre-installed, about 12 to 24 months
- Bluetooth 4.0+; iOS, Android, Tilt Pi and Google Sheets logging
Pros
- In-liquid temperature at a lower price than the Pro
- Ships calibrated; checks against plain water
- Runs several colors at once
Cons
- Shorter battery life than the Pro
- Two Tilts of the same color cannot share one app
- Krausen can stick to it and skew gravity
Skip it if: You brew in steel conicals and want the strongest signal, because the Pro suits that better.
Best for Pitching
4. ThermoWorks Sizzle Instant-Read Thermometer
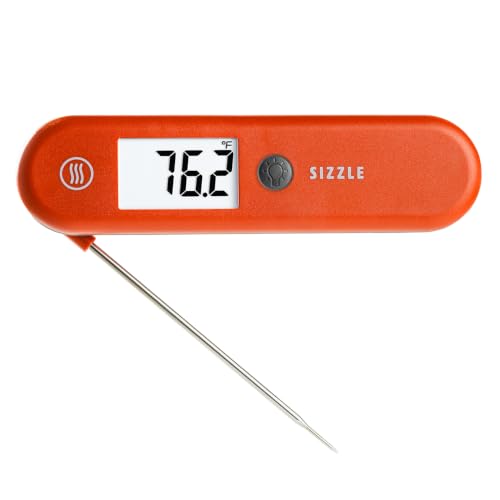
Best for: Brewers who chill wort and need a fast, accurate number before pitching, plus a reference to check other thermometers.
A stick-on strip cannot tell you when chilled wort is ready for yeast. Instead, you need a probe in the liquid. The ThermoWorks Sizzle reads in about 2 seconds and carries +/-0.9 F (+/-0.5 C) accuracy from -4 to 248 F. Therefore, it is accurate enough to act as your house reference.
In addition, it ships with a NIST-traceable calibration certificate, so you can compare a strip, dial or controller probe against it in the same bucket of water. It is also IP67 waterproof, which matters on a wet brew day.
- Range: -58 to 572 F (-50 to 300 C)
- Accuracy: +/-0.9 F from -4 to 248 F (+/-0.5 C from -20 to 120 C)
- Response: about 2 seconds; resolution 0.1 or 1 degree
- IP67 waterproof; 4.5 in (114 mm) probe; NIST-traceable certificate
Pros
- Tightest accuracy among the probes here
- Doubles as a check for every other thermometer
- Waterproof and quick to clean
Cons
- Spot checks only; it does not log
- Probe must be sanitized before it touches wort
- Overkill if you only brew kombucha
Skip it if: You never chill hot wort, because a strip covers most kombucha and wine needs.
Best Budget
5. Bucha Brewers Adhesive Thermometer Strips (10-Pack)
Best for: Kombucha makers and brewers with several jars or buckets who want a cheap, always-on glance at the wall temperature.
In general, stick-on strips use liquid crystals that change color as the vessel wall warms or cools. A highlighted number or color band then shows the reading. Because this pack has ten strips, you can label every jar, carboy and spare bucket at once.
However, a strip reads the outside wall, not the core. During active fermentation the liquid inside can run warmer than the wall, and a strip in a cold draft may read low. So treat it as a trend gauge and confirm it against a probe now and then.
- Liquid crystal adhesive strips, pack of 10
- Reads Fahrenheit and Celsius
- Sticks to glass and plastic jars
- Made for kombucha brewing
Pros
- Lowest cost per vessel
- No batteries, apps or wires
- Easy to read at a glance in good light
Cons
- Reads the wall, not the liquid
- Hard to read in dim light
- Cannot be moved once stuck on
Skip it if: You need to hit a narrow lager range, because a strip cannot resolve small changes.
Best Heat-Only Controller
6. BN-LINK Digital Heat Mat Thermostat

Best for: Kombucha brewers and anyone fermenting in a cool basement who only needs to add heat.
However, not every batch needs a fridge. Instead, in a cold house the problem is too little heat. The BN-LINK thermostat reads a probe on the vessel and switches a heat mat or wrap on and off within a 40 to 108 F (4.4 to 42.2 C) control range.
Because it is heat-only, it cannot cool a batch that runs warm. For that reason, it suits kombucha, which likes warm rooms, and ales in a cold basement, not lagers. Also, the probe cable is 4.92 ft (1.5 m), so the controller can sit away from spills.
- Control range: 40 to 108 F (4.4 to 42.2 C), F or C display
- Load: 120 VAC, 8.3 A / 1000 W maximum
- Probe cable: 4.92 ft (1.5 m)
- ETL listed; heating devices only
Pros
- Simple plug-in setup for heat mats
- Range fits kombucha and ale temperatures
- ETL safety listing
Cons
- Cannot run a fridge or cooler
- No calibration details published
- Single outlet only
Skip it if: Your batches run too warm in summer, because you need a dual-stage unit like the ITC-308.
Best Dial
7. MEASUREMAN Stainless Bimetal Dial Thermometer (6 in Stem)
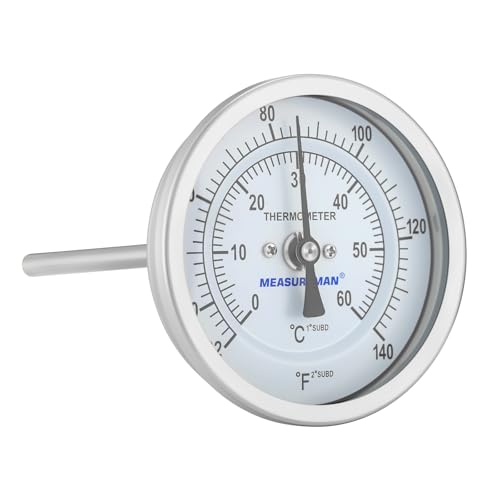
Best for: Brewers with a fermenter or kettle that has a 1/2 in NPT thermometer port and who want a reading with no batteries.
A bimetal dial gives a battery-free reading through the wall of a vessel. For example, this MEASUREMAN model has a 3 in (76 mm) dial and a 6 in (152 mm) stem. Its 32 to 140 F (0 to 60 C) scale covers lagers, ales, wine and kombucha with room to spare.
MEASUREMAN rates it at +/-1%. If that figure applies to the full 108 F span, it works out to about 1 F (0.6 C). Better still, the dial is adjustable, so you can reset it after an ice-water check.
- Dial 3 in (76 mm); stem 6 in (152 mm)
- Range: 32 to 140 F (0 to 60 C)
- Accuracy: +/-1%; adjustable calibration
- 1/2 in NPT back mount; fully stainless steel
Pros
- No batteries or pairing
- Long stem reaches the liquid core
- Can be recalibrated
Cons
- Needs a threaded port or weldless fitting
- Slower to settle than a digital probe
- Hard to sanitize if left in place
Skip it if: Your fermenter has no port, because a strip, Tilt or probe in a thermowell is simpler.
Best Budget Probe
8. Inkbird IHT-1P Instant-Read Thermometer

Best for: New brewers who want a waterproof probe for mash, chilling and pitching checks without paying for a lab-grade tool.
The IHT-1P covers the same jobs as the Sizzle at a lower tier. Specifically, it reads from -58 to 572 F (-50 to 300 C) with +/-2 F (+/-1 C) accuracy. That is good enough for pitching ales, although the Sizzle is tighter.
Also, a read-hold lock keeps the number on screen after you pull the probe out of a hot kettle. A calibration offset of +/-5 F (+/-3 C) lets you correct it after an ice-water test. Finally, it runs on a built-in rechargeable battery and has an IPX5 rating against splashes.
- Range: -58 to 572 F (-50 to 300 C)
- Accuracy: +/-2 F (+/-1 C)
- Calibration offset: +/-5 F (+/-3 C); read-hold lock
- IPX5 splash resistance; rechargeable 250 mAh battery
Pros
- Low cost for a digital probe
- Calibration offset built in
- Backlit display for dim garages
Cons
- Wider tolerance than the Sizzle
- Splash resistant, not fully waterproof
- Battery needs regular charging
Skip it if: You want one reference thermometer to check all the others, because the Sizzle is more accurate.
How We Chose the Best Fermentation Thermometer
We did not run hands-on tests. Instead, our picks are research-based. First, we read the maker’s own spec pages and manuals for accuracy, range, resolution and calibration options. Next, we compared those numbers with what fermentation actually needs. Finally, we weighed owner feedback on readability, battery life and signal problems.
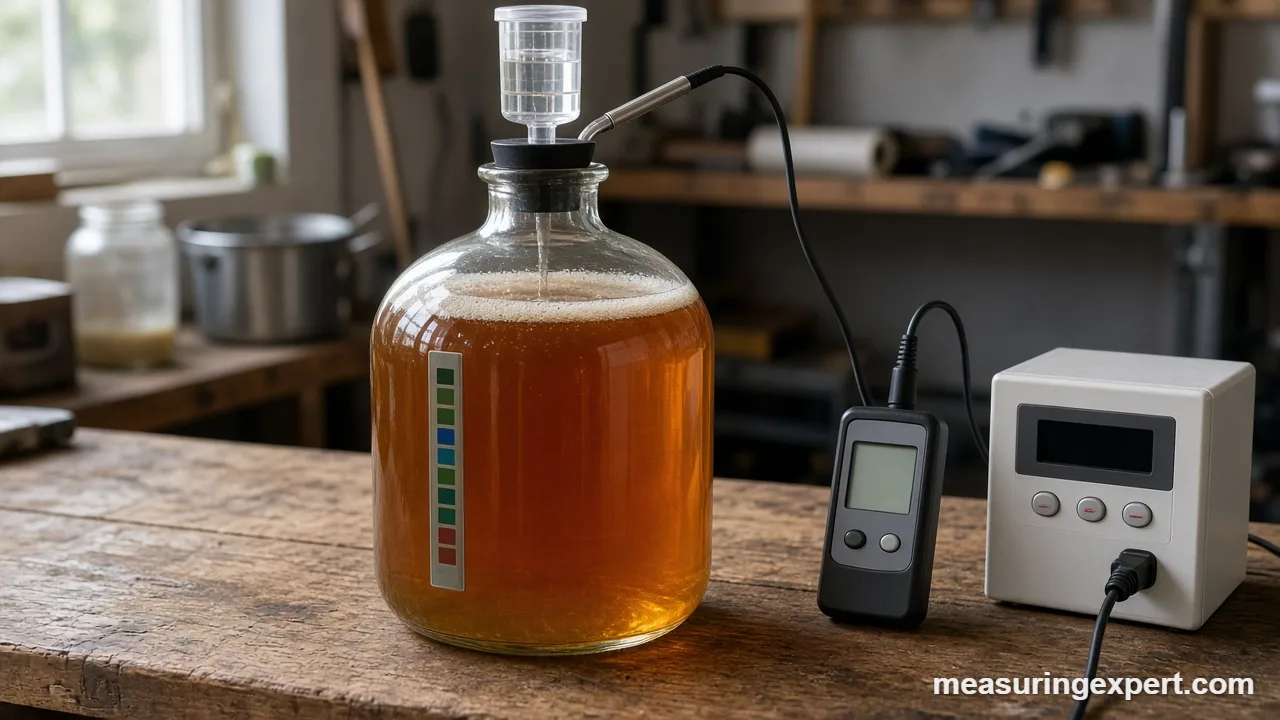
- Where it measures: inside the liquid, through a thermowell, or on the outside wall.
- Published accuracy: we favored tools whose makers state a tolerance, such as +/-1 F (+/-0.5 C).
- Range and resolution: the scale must cover lagers near 45 F (7 C) and kombucha near 85 F (29 C).
- Calibration: an offset, an adjustable dial or a certificate earns points.
- Use case spread: we chose one tool per job, with no more than two per brand.
Our main sources were the Tilt Pro spec sheet, the ThermoWorks Sizzle specifications, Inkbird’s ITC-308 product page, and the Brew Your Own guide to controlling fermentation temperature.
Strip, Probe, Dial or Floating Sensor: Types Compared
Overall, each type answers a different question. So, many brewers end up with two: one that watches the batch all the time and one that checks it accurately.
| Type | What it measures | Typical accuracy | Best use |
|---|---|---|---|
| Adhesive strip | Outside wall of the vessel | Rarely published; reads in coarse steps | Kombucha jars, spare fermenters |
| Controller probe | Wall (taped) or core (in a thermowell) | About +/-1 to 2 F (+/-0.5 to 1 C) | Fridges, freezers, heat wraps |
| Floating wireless sensor | The liquid itself | +/-1 F (+/-0.5 C) for Tilt | Logging temperature with gravity |
| Bimetal dial | Liquid around the stem | About +/-1% of scale | Fermenters and kettles with a port |
| Instant-read probe | Liquid at the tip | +/-0.9 to 2 F (+/-0.5 to 1 C) | Pitching checks, reference checks |
Where the Best Fermentation Thermometer Should Measure
First, yeast give off heat as they work. According to Brew Your Own, active fermentation can warm a typical 5-gallon (19 L) batch by 10 to 15 F (5.5 to 8.3 C) above its surroundings. As a result, a room at 64 F (17.8 C) can hold a beer near 75 F (23.9 C) on day two.
Meanwhile, the wall of the fermenter sits between those two numbers. Because of that, a strip or a taped probe usually reads lower than the core when fermentation is vigorous.
In contrast, a thermowell fixes this. It is a thin steel tube, closed at the bottom, that drops through the stopper or lid into the wort. Next, you slide the controller probe inside, and it reads the core without touching the beer. Floating sensors such as the Tilt measure the core directly. If you tape a probe to the outside, cover it with a folded towel or foam pad. That shields it from room air, so it tracks the wall more closely.
Specs That Separate the Best Fermentation Thermometer from the Rest
Accuracy is how close the reading sits to the true temperature. For example, +/-1 F means a 66 F reading could be anywhere from 65 to 67 F. For ales that is fine; however, for lagers or a yeast with a narrow range, tighter is better.
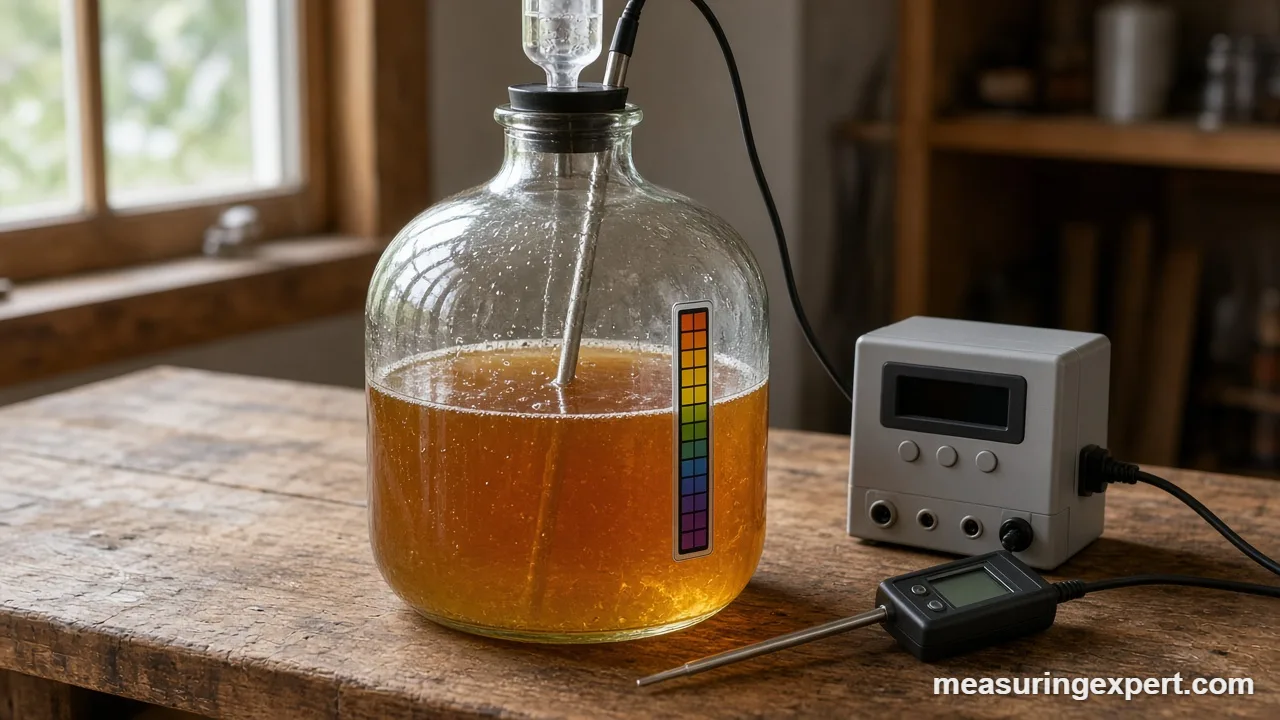
Resolution is the smallest step the display shows, such as 0.1 degree. However, resolution is not accuracy. Still, it helps you see a slow drift before it becomes a problem.
Range must cover your coldest and warmest process. A cold crash near 35 F (1.7 C) and a kombucha batch at 85 F (29.4 C) need a scale that spans both. In addition, a probe used on brew day should handle near-boiling wort.
Calibration is your way to correct drift. Therefore, look for an offset setting, an adjustable dial nut or a traceable certificate. Without one, you can only note the error and adjust in your head.
Power and connectivity matter for sensors that live in the batch. Battery life of 12 months or more avoids opening a fermenter mid-batch. Meanwhile, Bluetooth range drops through steel, walls and fridge doors.
Fermentation Temperature Targets and Converter
First, start with the range on your yeast packet. As a general guide, Brew Your Own lists ales at about 68 to 72 F (20 to 22 C) and lagers at 45 to 55 F (7 to 13 C). Kombucha Kamp gives 72 to 85 F (22 to 29 C) as the ideal range for kombucha.
In short, the formulas are simple: C = (F – 32) x 5/9, and F = C x 9/5 + 32. Note that a temperature difference converts without the 32. So a 2 F swing equals about 1.1 C, and 10 F equals about 5.6 C. For weighing grain and hops, see our guide on how to measure ingredients for brewing beer.
How to Set Up a Probe and Controller, Step by Step
These steps suit the ITC-308 and most plug-in controllers. Still, follow your own manual where it differs.
- Check the probe first: Put it in a glass of ice water and set an offset if it does not read 32 F (0 C).
- Sanitize the thermowell: Clean and sanitize the tube, then fit it through the stopper or lid into the wort.
- Insert the probe: Slide the probe to the bottom of the thermowell so it sits in the middle of the batch.
- Plug in the devices: Connect the fridge to the cooling outlet and the heat wrap to the heating outlet.
- Set the target: Enter the yeast’s target temperature and a small differential, such as 1 F (0.5 C).
- Set a compressor delay: Use a few minutes of delay to protect the fridge from rapid cycling.
- Watch the first day: Check that the reading settles and that heat and cooling do not fight each other.
The Ice-Water Accuracy Check
Every thermometer can drift, so check yours before each season. Fill a tall glass with crushed ice, then add cold water until it reaches just below the top of the ice. Then stir for a minute. Next, place the probe or stem in the center, away from the glass walls, and wait for the reading to settle.
A good thermometer should read 32 F (0 C), within its stated accuracy. If it reads 33.5 F, for instance, set an offset of -1.5 F on a controller, or turn the calibration nut on a dial. However, strips cannot be adjusted. Instead, compare them with a trusted probe in the same water and write the difference on the strip with a marker.
Do and Don’t
Honest Limits of the Best Fermentation Thermometer
Still, a sensor only reports one spot. A tall conical can have a warmer top and cooler cone, so a single probe is an average at best. Also, floating sensors can pick up krausen or tilt against the wall, which affects gravity more than temperature.
Strips are the weakest link. Also, their color bands jump in coarse steps and follow room air as much as the beer. Finally, no thermometer controls anything by itself. If your room swings 15 F (8.3 C) a day, you need a controller and a heat or cooling source, not a better display.
Best Fermentation Thermometer FAQ
What is the best fermentation thermometer for beginners?
For most beginners, the best fermentation thermometer is a plug-in controller such as the Inkbird ITC-308 with its probe in a thermowell, plus a cheap strip on the fermenter. If you have no fridge or heater, start with strips and an instant-read probe.
Are stick-on fermentation thermometer strips accurate?
Strips are fine for trends but weak for precision. They read the outside wall, which can run several degrees cooler than the beer during active fermentation. So check them against a probe in water and note any difference.
Should the probe go in a thermowell or on the side of the fermenter?
A thermowell is better, because the probe then reads the core of the batch. If you tape the probe to the side, cover it with foam or a folded towel so room air does not skew it.
Is a Tilt hydrometer a good fermentation thermometer?
Yes. Tilt rates the original Tilt and the Tilt Pro at +/-1 F (+/-0.5 C), and both float in the liquid. They also log gravity, but they need a phone, tablet or Tilt Pi in Bluetooth range.
What temperature should beer ferment at?
Follow the yeast packet first. As a general guide, Brew Your Own lists ales at about 68 to 72 F (20 to 22 C) and lagers at 45 to 55 F (7 to 13 C).
What temperature is best for kombucha?
Kombucha Kamp lists 72 to 85 F (22 to 29 C) as the ideal range. In a cool house, a heat mat with a heat-only thermostat such as the BN-LINK keeps a jar in that range.
How do I calibrate a fermentation thermometer?
Use an ice-water bath. Stir crushed ice and water, place the probe in the center and wait. It should read 32 F (0 C); if not, set an offset or adjust the dial.
Why does my fermentation thermometer read lower than the beer?
Yeast produce heat, and active fermentation can run 10 to 15 F (5.5 to 8.3 C) above the room. A wall-mounted sensor sits between the beer and the room air, so it often reads low.
Can I use a meat thermometer for brewing?
Yes, an instant-read food probe works well for mash and pitching checks. Sanitize it before it touches cooled wort, and pick one with a stated accuracy of about +/-1 F.
Which is the best fermentation thermometer for wine?
For a carboy of wine, the best fermentation thermometer is often a Tilt or a strip plus a probe for spot checks. In addition, a controller helps if your room swings by more than a few degrees.
Bottom Line: Our Best Fermentation Thermometer Pick
Overall, the Inkbird ITC-308 is the best fermentation thermometer setup for most brewers, because it turns a reading into control. Add a Tilt Pro if you want logged gravity, and keep a Sizzle or IHT-1P on hand to check the rest. Meanwhile, cheap strips still earn a spot on every kombucha jar.
1 thought on “Best Fermentation Thermometer: 8 Picks for Beer, Wine and Kombucha”