

To find an Erlenmeyer flask volume accurately, weigh the empty flask, fill it with room-temperature distilled water to your line, and weigh it again. Then divide the grams of water by its density (0.9982 g/mL at 20 C). The printed marks, by contrast, are only good to about 5 percent.
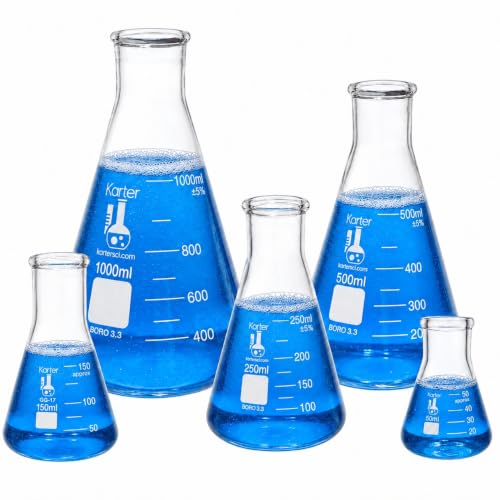
An Erlenmeyer flask is the cone-shaped flask with a flat bottom and a narrow neck that you see in almost every chemistry lab. Because of its shape, you can swirl a liquid hard without spilling it, which is why chemists like it for mixing, heating and titrations.
Most flasks also carry a short column of printed lines, such as 50, 100, 150 and 200 mL on a 250 mL flask. In fact, those lines look like a measuring scale. However, nobody calibrates them, so they only tell you roughly how much is inside.
In short: read the printed marks for a quick estimate, pour the contents into a graduated cylinder for a measurement within about 1 percent, and weigh water on a balance when you need the true Erlenmeyer flask volume of one particular flask.
The 5 percent figure comes from teaching labs, not from guesswork. For example, the Florida State University chemistry department notes that the volumes stamped on flasks are approximate, within about 5%. Likewise, the weighing method below is a simplified version of the one NIST describes in its SOP 14 for gravimetric calibration, which turns the mass of pure water into a volume.
Below, you will first find a converter for your result. After that, the guide compares three methods, walks through the weighing method step by step, and also explains when the result is good enough.
Convert Your Erlenmeyer Flask Volume to Other Units
First, enter the volume you measured in milliliters. The converter then shows it in US fluid ounces, cups, liters, cubic centimeters and spoons. Remember that the answer is only as good as your reading, so a value taken from the printed marks still carries about 5 percent uncertainty.
- The printed marks on an Erlenmeyer flask are approximate, typically within about 5 percent.
- In contrast, weighing water is the most accurate home or classroom method.
- One gram of water is close to 1 mL, but use 0.9982 g/mL at 20 C for better results.
- Meanwhile, a graduated cylinder gets you within about 1 percent with no scale needed.
- Geometry formulas give only a rough estimate because flasks are not perfect cones.
- Brim-full capacity is always larger than the top printed line.
Three Ways to Measure Erlenmeyer Flask Volume
In general, each method trades speed for accuracy. So pick the one that matches what you need the number for.
| Method | What you need | Typical accuracy | Best for |
|---|---|---|---|
| Read the printed marks | Nothing extra | About plus or minus 5% | Mixing, rough batches |
| Pour into a graduated cylinder | A Class A or B cylinder | About 1% or better | Classroom labs, homebrew starters |
| Weigh water on a balance | Scale reading to 0.01 g or 0.1 g, distilled water, thermometer | Often better than 0.5% | Calibrating one flask, finding its full capacity |
| Geometry formula | Ruler or calipers | Rough, often off by 10% or more | Homework, sanity checks |
For a broader comparison of glassware, see our guide to lab equipment used to measure volume.
Recommended Tools for Measuring Erlenmeyer Flask Volume
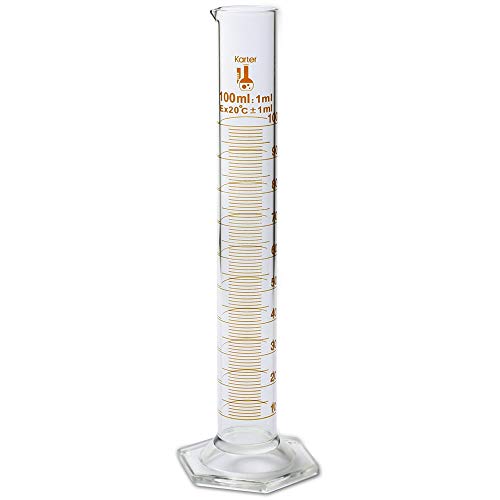
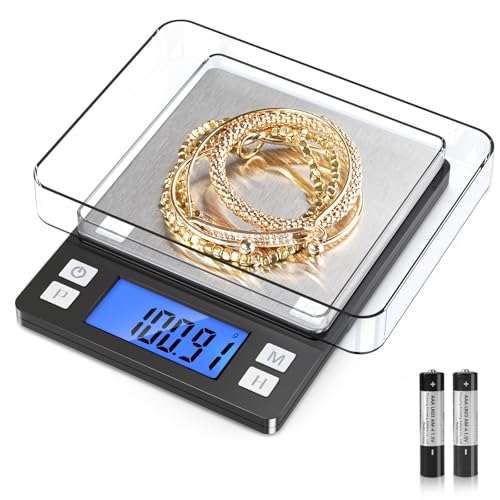
Overall, you do not need much. First, a set of borosilicate flasks in several sizes lets you match the flask to the job. Next, a Class A graduated cylinder gives you a stated tolerance to check against. Finally, a scale that reads to 0.01 g, and holds more than your flask full of water, makes the weighing method possible.



As an Amazon Associate, Measuring Expert earns from qualifying purchases.
How to Measure Erlenmeyer Flask Volume by Weighing Water
Specifically, this is the same idea that calibration labs use, simplified for a classroom or kitchen bench. It works because the density of water is known very precisely at each temperature.
- Clean and dry the flask. Otherwise, any water left inside adds weight that is not part of your measurement.
- Let the water reach room temperature. Also, use distilled or deionized water and note its temperature with a thermometer.
- Weigh the empty flask. Place it on the scale and write down the mass, or press tare to zero it.
- Fill the flask to your line. Add water up to the mark you want to check, or to the brim if you need the full capacity. Then use a dropper for the last few drops.
- Weigh the full flask. Next, record the mass and subtract the empty mass to get the grams of water.
- Divide by the density of water. At 20 C, divide by 0.9982; at 25 C, divide by 0.9970. The result is the volume in mL.
Next, enter that number in the converter above if you also want it in ounces or cups.
Water Density by Temperature
| Water temperature | Density (g/mL) | 250.0 g of water equals |
|---|---|---|
| 15 C (59 F) | 0.9991 | 250.23 mL |
| 20 C (68 F) | 0.9982 | 250.45 mL |
| 25 C (77 F) | 0.9970 | 250.75 mL |
| 30 C (86 F) | 0.9957 | 251.08 mL |
Worked Example: A 250 mL Flask
For instance, here is a realistic set of readings. They are an example, so your own flask will give different numbers.
| Step | Reading | Result |
|---|---|---|
| Empty flask | 112.6 g | – |
| Filled to the 250 mL mark | 356.6 g | 244.0 g of water |
| Volume at the mark (20 C) | 244.0 / 0.9982 | 244.44 mL (8.27 US fl oz) |
| Filled to the brim | 405.0 g | 292.4 g of water |
| Brim-full volume (20 C) | 292.4 / 0.9982 | 292.93 mL (9.91 US fl oz) |
In this example, the 250 mL line actually marks about 244 mL, which is 2.2 percent low. In other words, that is well inside the usual 5 percent. Meanwhile, the brim-full capacity is almost 293 mL, so the flask holds noticeably more than its label.
Measuring With a Graduated Cylinder Instead
No scale? Then a graduated cylinder is the next best option. First, fill the flask to the line you want to check, and pour the water into a dry cylinder that is the same size or larger. After that, read the bottom of the meniscus at eye level.
If the flask is bigger than your cylinder, pour in batches and add the readings together. However, every pour adds a small reading error and leaves a film of water behind, so one large cylinder beats several small ones. Our comparison of a buret vs graduated cylinder explains how close each one gets.
Can a Formula Give the Erlenmeyer Flask Volume?
Only roughly. Many guides, for example, treat the flask as a cone and use V = (1/3) x pi x r squared x h. For instance, a cone with a 5 cm base radius and a 15 cm height works out to 392.7 cm3 (392.7 mL). Yet a real flask is not a pointed cone: it has a rounded heel, a flat shoulder and a neck.
Instead, a better geometric model is a truncated cone (frustum): V = (pi x h / 3) x (R squared + R x r + r squared), where R is the inside base radius and r is the inside radius at the top of the cone. With R = 4.0 cm, r = 1.5 cm and h = 9 cm, that gives about 228.6 mL. Even so, glass thickness and the curved base make this an estimate, which is why weighing water wins.
Erlenmeyer Flask Volume: Printed Marks vs Real Capacity
People often confuse three different numbers on the same flask. So this table separates them.
| Number | What it means | How exact it is |
|---|---|---|
| Nominal size (for example, 250 mL) | The size class printed on the flask | A label, not a measurement |
| Graduation marks | Rough fill levels below the shoulder | About plus or minus 5% |
| Brim-full capacity | What the flask holds filled to the top | Always larger than the nominal size; measure it by weighing |
The same rule also applies to beakers. If you want to compare, our guide on how to measure volume with a beaker covers its marks in detail.
Do and Don’t for Accurate Flask Readings
Do
- Use distilled water at room temperature.
- Read the bottom of the meniscus at eye level.
- Tare the scale with the dry flask on it.
- Write down the water temperature.
- Repeat the weighing two or three times and average.
Don’t
- Trust the printed marks for analytical work.
- Measure with hot or ice-cold water.
- Leave droplets on the outside of the flask.
- Use a cracked or chipped flask.
- Assume the brim holds exactly the nominal size.
Honest Limits of These Methods
Of course, no home method matches a calibration lab. For one thing, a kitchen or pocket scale has its own tolerance, so check it with a known weight first. Air bubbles, droplets on the neck and a wet outer surface also add small errors. In addition, glass expands slightly with temperature, although that effect is tiny next to the 5 percent uncertainty of the marks. Finally, NIST’s full procedure also corrects for air buoyancy, which this simplified version skips. As a result, treat a home weighing as good to a few tenths of a percent, not better.
When to Use Calibrated Glassware Instead
Above all, an Erlenmeyer flask is a mixing vessel. So if a result depends on an exact volume, such as a standard solution, a titration endpoint or a quality-control test, measure the liquid with a volumetric flask, pipet or buret, and then transfer it to the Erlenmeyer flask. Similarly, regulated labs should send glassware to an accredited calibration lab rather than rely on a bench check.
Frequently Asked Questions
How do you measure Erlenmeyer flask volume accurately?
Weigh the empty flask, fill it with distilled water to the line, and weigh it again. Then divide the grams of water by 0.9982 at 20 C to get milliliters.
Are the marks on an Erlenmeyer flask accurate?
Not very. The printed marks are approximate and usually good to about 5 percent, so a 100 mL mark could mean roughly 95 to 105 mL.
Can you use a scale to find Erlenmeyer flask volume?
Yes. In fact, weighing water is the most accurate simple method, because 1 mL of water weighs close to 1 g and its exact density at each temperature is well known.
How much does a 250 mL Erlenmeyer flask hold when full?
It depends on the model, but the brim-full capacity is always more than 250 mL. So weigh the water in your own flask to find out.
Is Erlenmeyer flask volume the same as its label size?
No, because the label is a size class. The real volume at the top mark can be a few percent off, and the brim holds more.
Can I use a measuring cup to check a flask?
Only for a rough check. Kitchen measuring cups have wide markings, so a graduated cylinder or a scale is much more reliable.
What formula gives Erlenmeyer flask volume?
A frustum (truncated cone) formula gives a rough estimate: V = (pi x h / 3) x (R squared + R x r + r squared). Real flasks have curved bases and necks, so weighing is more accurate.
Why is an Erlenmeyer flask not used for exact measurements?
Its wide, sloping body means a small change in liquid height makes a large change in volume. In addition, the marks are not calibrated.
Does water temperature matter?
A little. Water is slightly less dense when warm, so 250.0 g is 250.45 mL at 20 C but 250.75 mL at 25 C.
Which glassware should I use for exact volumes?
Use a volumetric flask, a volumetric pipet or a buret. Alternatively, Class A graduated cylinders are a good middle ground.
Erlenmeyer Flask Volume: The Bottom Line
To sum up, the printed lines on an Erlenmeyer flask are a convenience, good to about 5 percent. For a better number, pour the contents into a graduated cylinder. For the best number, however, weigh distilled water and divide by its density.
Once you have the result, the converter at the top of this page turns it into ounces, cups or liters. And for exact work, measure with volumetric glassware first and use the flask only for mixing.