
To use a cooking thermometer correctly, push the probe into the thickest part of the food, keep it away from bone, fat, and the pan, and wait until the number stops changing. Then compare that number to the safe minimum: 165°F for poultry, 160°F for ground meat, and 145°F for whole cuts of beef, pork, lamb, and fish. Check more than one spot, and wash the probe afterward.
Most bad readings come from small mistakes. A probe that touches bone reads too high. A probe placed near the surface reads high too, because the outside of the food is hotter than the center. A thermometer that has drifted a few degrees gives you false confidence. Judging doneness by color or clear juices is even less reliable. The result is dry chicken at best and undercooked burgers at worst.
Measuring Expert focuses on measuring tools and their accuracy, and a thermometer is only as accurate as the way you use it. This guide covers the types of thermometers first. Then it walks through four steps: calibrate, place the probe, read the temperature, and avoid the mistakes that skew results.
Read unlimited home, cooking and DIY books
Know your thermometer before you cook
A cooking thermometer measures the internal temperature of food, which is the only dependable sign that it is both safe and properly cooked. Picking the right type and understanding why you need one makes every later step easier.
Why color and touch are not enough
Color, firmness, and juices change with the cut, the fat content, and the cooking method. Ground beef can turn brown before it reaches a safe temperature. A pork chop can stay slightly pink and still be fully safe. Neither cue tells you the number that matters.
A thermometer also protects quality. A pork chop pulled at 145°F stays juicy, while one cooked "until it looks done" often lands past 160°F and dries out.
Color and juices are guesses, and a thermometer is a measurement.
Which type fits the job
Instant-read digital thermometers suit most home cooks. Leave-in probes and wireless probes suit long roasts, grills, and smokers. The table shows how the common types differ.
| Type | Best for | Stays in the oven? | Reading time |
|---|---|---|---|
| Instant-read digital | Steaks, chops, burgers, chicken checks | No | A few seconds |
| Leave-in probe with cable | Roasts, whole turkey | Yes, with the display outside | Continuous |
| Wireless probe | Long roasts, grill, smoker | Yes | Continuous, with alerts |
| Dial (bimetallic) | Roasts, if labeled oven-safe | Some models only | 15 to 20 seconds |
| Infrared | Pan, grill, and oil surfaces | Not applicable | Instant, surface only |
Choose an instant-read model with a thin tip, because it handles thin cuts and gives a fast answer. An infrared thermometer never measures the inside of food, so it cannot replace a probe. Before any thermometer goes into an oven, check the label for oven safety, because the casing and electronics on most instant-read models cannot take the heat.
Step 1. Calibrate your thermometer
Calibrate by checking your thermometer in ice water, where it should read 32°F (0°C). Do this when the thermometer is new, once every month or two, and after any drop.
Run the ice-water test
- Fill a glass to the top with crushed ice, then add cold water.
- Stir and wait one minute.
- Submerge the probe about 2 inches without touching the glass.
- Wait for the reading to settle. It should say 32°F.
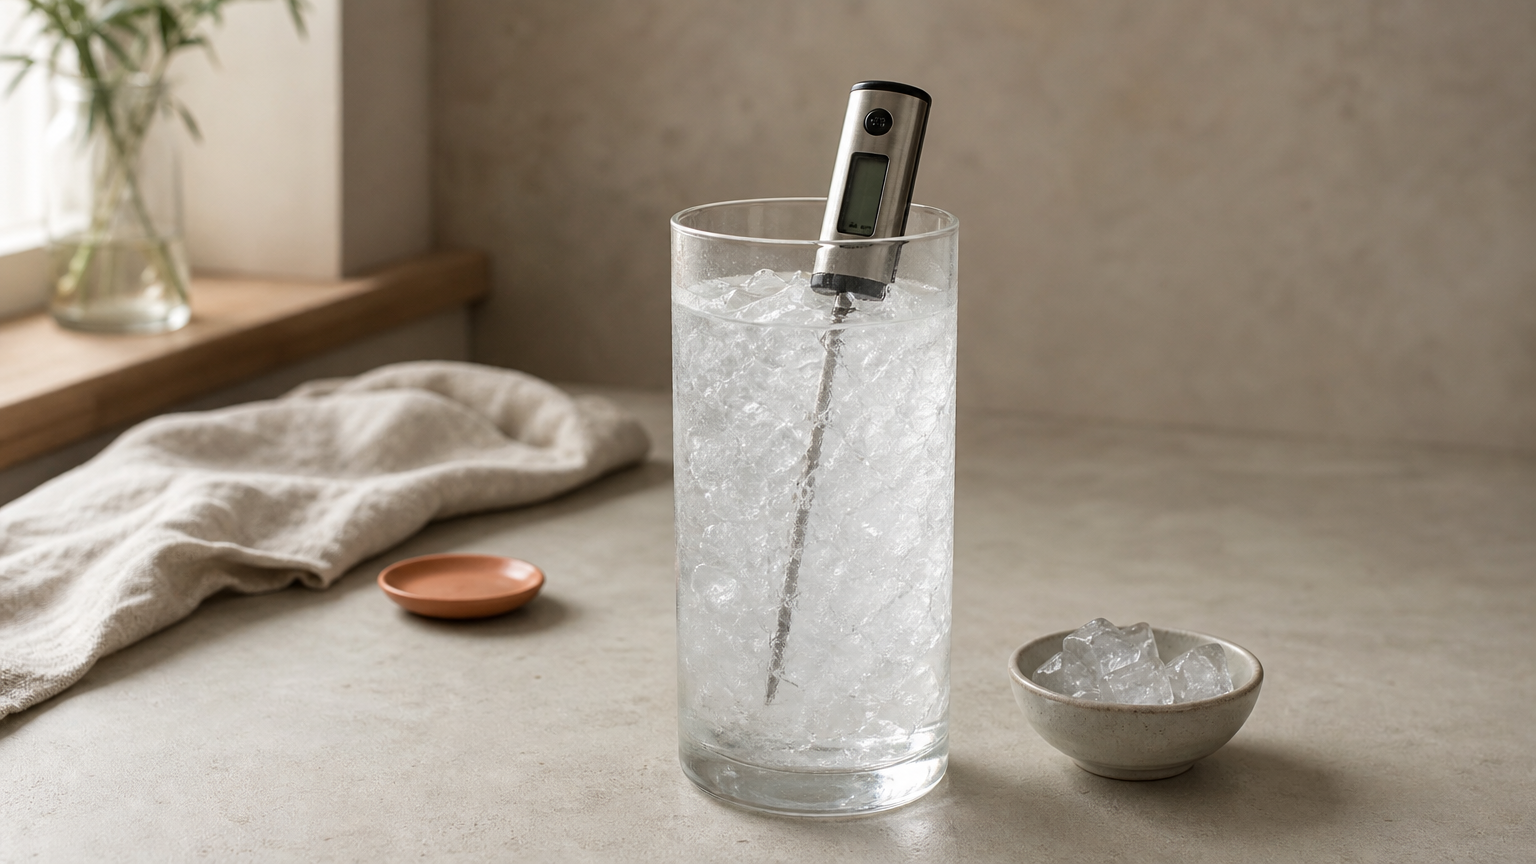
A reading within 2°F is fine for cooking. Past that, the thermometer needs adjusting or replacing.
Fix or retire a thermometer that is off
Many digital models have a reset button, and many dial models have a nut under the head that you turn while the probe sits in ice water. Follow the manual for your model. If yours has neither, note the offset and correct for it, or replace the thermometer if it is off by more than 2°F.
You can also test in boiling water. Water boils at 212°F (100°C) at sea level, and the boiling point drops about 1°F for every 500 feet of elevation. At 5,000 feet, expect roughly 202°F.
Ice water is free, takes a minute, and tells you whether to trust every number that follows.
Step 2. Place the probe in the thickest part
Insert the probe into the thickest part of the food, aiming for the center, and keep the tip away from bone, fat, gristle, and the pan. The center is the last area to heat up, so it tells you when the whole piece is done.
Depth and angle
A digital probe needs to be inserted deep enough that the sensor sits in the food. That is usually at least half an inch, and many probes need more. Look for the small notch or dimple on the stem and bury it. A dial thermometer typically needs about 2 inches, because its sensing area is longer.
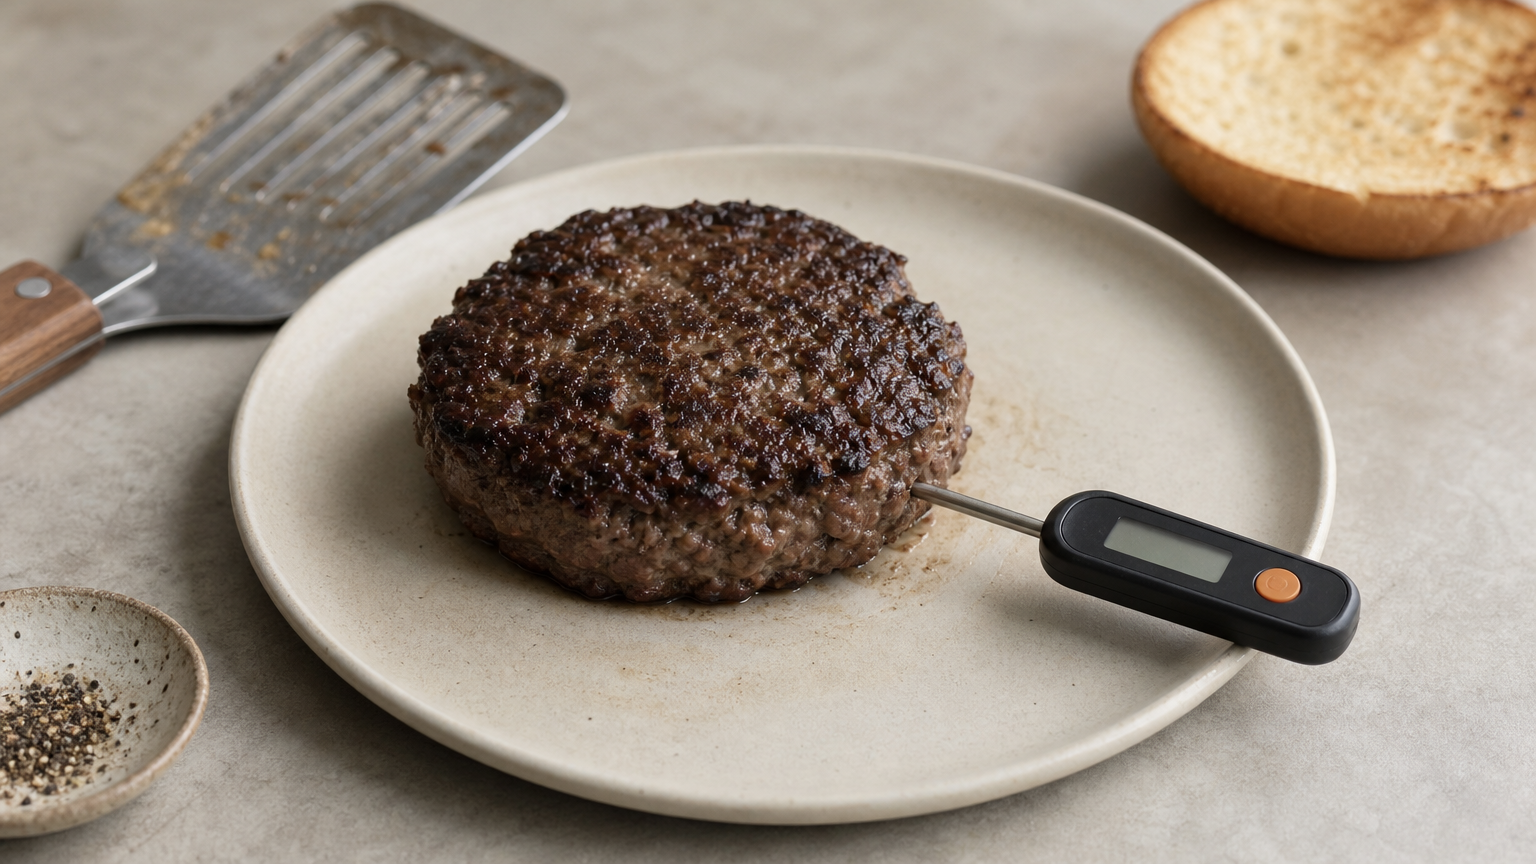
For thin foods such as burgers, chops, and fish fillets, insert the probe from the side so the tip rests in the center. Pushing straight down from above often misses the middle or hits the pan.
Where to probe common foods
| Food | Where to insert |
|---|---|
| Whole chicken | Thickest part of the thigh without touching bone, then the thickest part of the breast |
| Whole turkey | Innermost part of the thigh, the wing, and the thickest part of the breast |
| Steaks and chops | From the side into the center of the thickest part |
| Burgers and meatballs | From the side into the center |
| Roasts | Center of the thickest part, away from bone |
| Fish fillets | Thickest part, from the side |
| Casseroles, egg dishes, leftovers | Center, then two or three other spots |
Check more than one spot on large or uneven foods. When the readings differ, trust the lowest one, because that spot is the least cooked.
The coolest spot decides when the food is done, so probe where the heat arrives last.
Step 3. Read the temperature and act on it
Wait until the number stops changing, compare it to the safe minimum for that food, and pull the food when it is there. The reading is useless if you take it too early or ignore the target.
How long to wait
A digital instant-read thermometer settles in a few seconds. Hold the probe still until the digits stop moving for two or three seconds. A dial thermometer can take 15 to 20 seconds, so be patient. When checking food in the oven, slide the rack out instead of holding the door open, because the oven loses heat quickly.
Safe internal temperatures
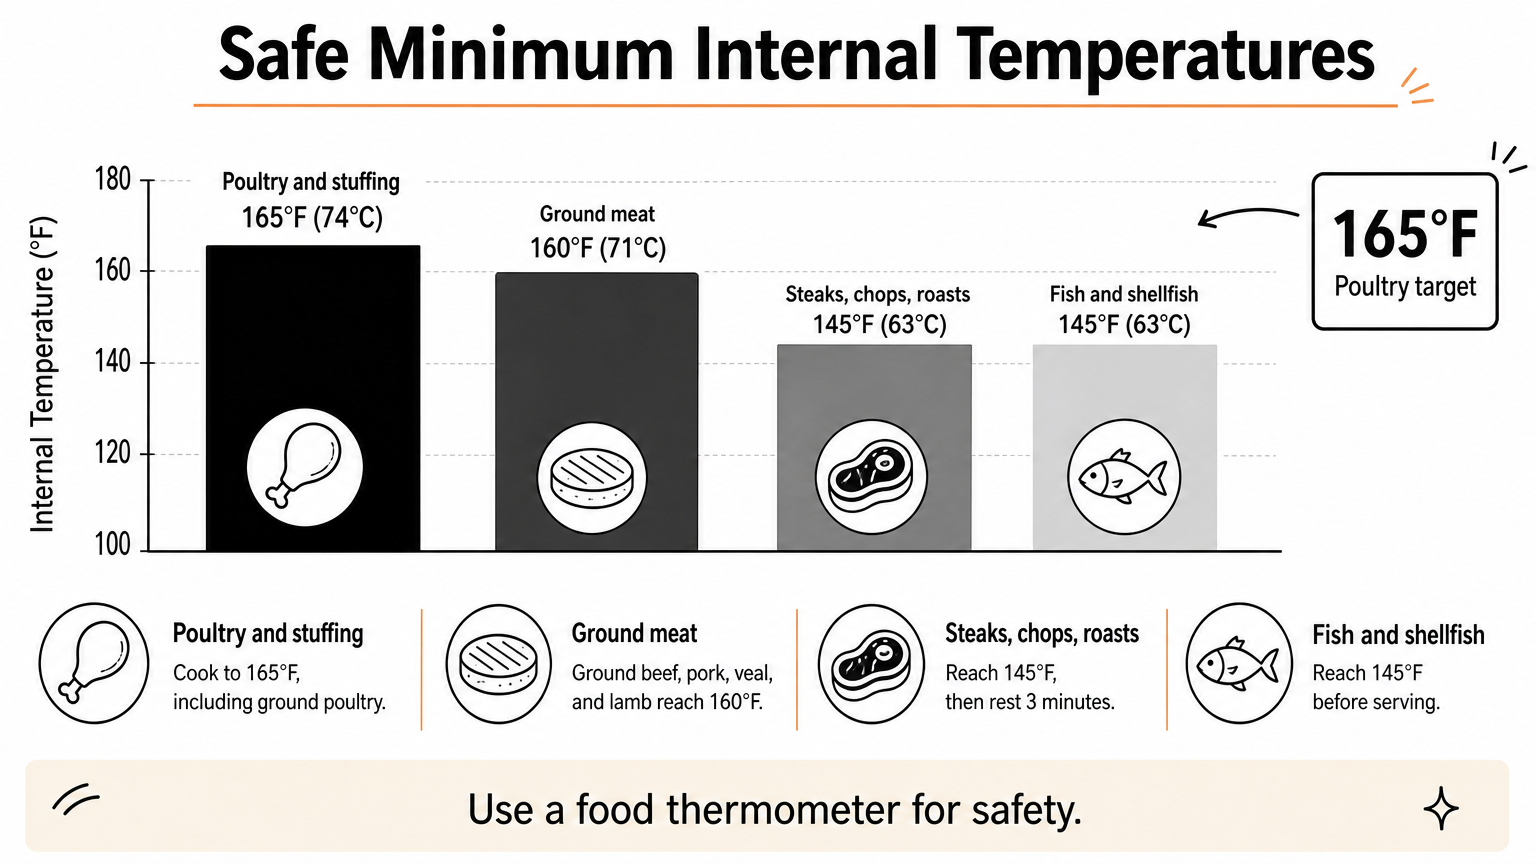
These are the USDA’s minimums. You can see the full list in the USDA safe minimum internal temperature chart.
| Food | Minimum temperature |
|---|---|
| Poultry, including ground, and stuffing | 165°F (74°C) |
| Ground beef, pork, veal, and lamb | 160°F (71°C) |
| Beef, pork, veal, and lamb steaks, chops, and roasts | 145°F (63°C), then rest 3 minutes |
| Fish and shellfish | 145°F (63°C) |
| Egg dishes | 160°F (71°C) |
| Leftovers and casseroles | 165°F (74°C) |
Many cooks pull whole-muscle steaks below 145°F for medium-rare. That is a personal-risk choice, and it is not advised for young children, pregnant women, older adults, or anyone with a weakened immune system. Ground meat and poultry have no such flexibility.
Pull early and let carryover finish
Food keeps cooking after you remove it from the heat. Thin cuts rise a few degrees, while large roasts can climb 5 to 15°F while resting.
Here is a worked example with a 3-pound pork loin roast and a 145°F target. Pull it from the oven at 140°F and tent it loosely with foil. Probe it again after about 5 minutes. If it reaches 145°F, let it finish its 3-minute rest and slice. If it stalls at 142°F, put it back in the oven for 5 minutes and check again.
Use this trick only on large roasts. For poultry and ground meat, reach the safe number on the thermometer before you pull.
Pull big roasts a few degrees early, then let a second reading confirm the finish.
Step 4. Avoid common mistakes and clean the probe
Most inaccurate readings trace back to placement or timing, and most food safety slips trace back to a dirty probe. A quick check of both keeps your results reliable.
Mistakes that skew the reading
- Touching bone. Bone heats faster than muscle and reads high.
- Probing fat or gristle. These heat at a different rate and mislead you.
- Going too shallow. If the sensor is not fully in the food, you read the air or the surface.
- Hitting the pan. The metal is hotter than the food and gives a false high.
- Reading too soon. A moving number is not a final answer.
- Checking one spot. Uneven foods need two or three readings.
- Leaving an instant-read thermometer in the oven. Only leave-in probes are made for that.
Clean and store the probe
Wash the probe in hot, soapy water after each use, and always between raw and cooked food. A probe that touched raw chicken should never touch the finished bird. An alcohol wipe works for a quick clean between checks. Do not submerge the head unless the manufacturer says it is waterproof.
Dry the probe, put the cap back on, and store it in its sleeve. If you cook with children, let them read the display or run the ice-water test while you handle the hot food.
Wash the probe between raw and cooked food, every time.
Take the guesswork out of dinner
Using a cooking thermometer comes down to four habits. Calibrate it, probe the thickest part, wait for a stable number, and match that number to the safe minimum. Add a clean probe, and you can trust what the display tells you.
Once these steps feel automatic, you will stop cutting into food to check it and start cooking to the number. If you want more help choosing and testing kitchen tools, browse the practical measuring tool guides and kitchen tips at Measuring Expert.
Black Friday is coming: shop the deals with Prime