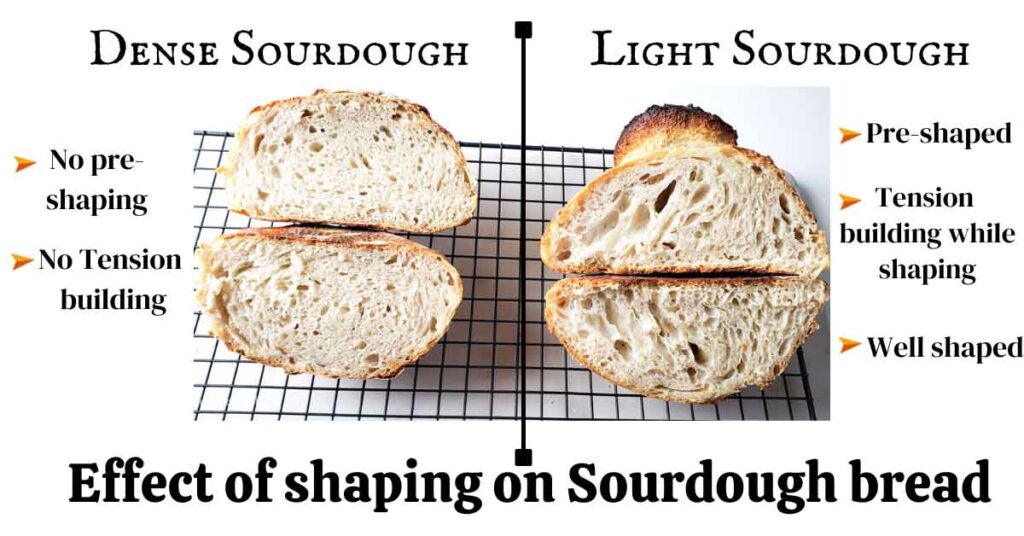
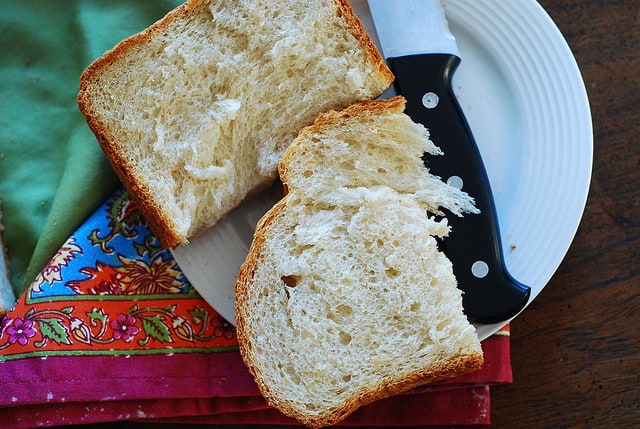
To make bread less dense, use more yeast and ensure proper kneading. Let the dough rise adequately before baking.
Bread density often results from insufficient yeast or poor kneading techniques. Yeast helps the dough rise, creating a light and airy texture. Proper kneading develops gluten, which traps air bubbles in the dough. Ensuring the dough rises long enough allows it to expand fully, preventing a dense loaf.
Use a kitchen thermometer to check the water temperature, as yeast needs a warm environment to activate. Also, measure ingredients accurately to maintain the correct dough consistency. Following these steps will lead to a lighter, fluffier bread, enhancing your baking results.
Choose The Right Flour
To make bread less dense, choosing the right flour is crucial. The type of flour and its protein content play a vital role. Let’s explore these factors to achieve a lighter, fluffier bread.
Type Of Flour
Different types of flour have different properties. Bread flour, all-purpose flour, and whole wheat flour are common choices.
| Flour Type | Properties | Best Use |
|---|---|---|
| Bread Flour | High in protein, strong gluten | Ideal for bread, chewy texture |
| All-Purpose Flour | Moderate protein, versatile | Good for most recipes |
| Whole Wheat Flour | High in fiber, dense | Healthy bread, denser texture |
Protein Content
Protein content affects gluten development. Gluten makes the bread rise and gives it structure.
- High Protein Flour: More gluten, more rise.
- Low Protein Flour: Less gluten, denser bread.
Bread flour has the highest protein content. It is the best choice for lighter bread. All-purpose flour is a good middle ground. Whole wheat flour has lower protein and is denser.
Understanding these factors helps in making better bread. Choose the right flour for a less dense loaf.
Perfecting The Dough
Making bread less dense starts with perfecting the dough. The key lies in the right techniques and ingredients. Follow these steps to make your dough perfect for light, fluffy bread.
Kneading Techniques
Kneading develops gluten in the dough. This creates structure and strength. Here are some kneading tips:
- Use the push-fold-turn method.
- Knead for 10 minutes to develop enough gluten.
- Test the dough by stretching it. It should not break easily.
Good kneading makes the dough elastic and smooth. Do not skip this step.
Proper Hydration
Hydration means the water content in the dough. It affects the dough’s consistency and texture. Follow these guidelines:
| Flour Type | Hydration Level |
|---|---|
| All-purpose flour | 60-65% |
| Bread flour | 65-70% |
| Whole wheat flour | 75-80% |
Use a kitchen scale for accurate measurements. Too much or too little water can affect the bread’s density.
Combine these tips for perfect dough. Your bread will be lighter and less dense.
Optimal Proofing
Optimal proofing is crucial for making bread less dense. Proofing allows the dough to rise and develop a better texture. This process involves controlling the temperature and time to get the best results.
Ideal Temperature
The proofing temperature plays a key role in bread making. A warm environment helps the yeast to ferment. The ideal temperature range is between 75°F to 85°F (24°C to 29°C). If the temperature is too low, the dough will rise slowly. If it is too high, the yeast will become too active and may die.
To achieve this temperature, you can use a proofing box. Alternatively, a warm spot in your kitchen or an oven with the light on can work. Just ensure the temperature stays within the optimal range.
Proofing Time
The proofing time also affects the bread’s texture. A longer proofing time allows the dough to develop more flavor and structure. Generally, the first proofing takes about 1 to 2 hours. The dough should double in size during this period.
After the first proofing, punch down the dough to release the gas. Then, shape it and let it proof again. The second proofing usually takes 30 minutes to 1 hour. This step is vital for achieving a light and airy texture.
Here is a simple table to summarize the proofing process:
| Proofing Stage | Time | Temperature |
|---|---|---|
| First Proofing | 1 to 2 hours | 75°F to 85°F |
| Second Proofing | 30 minutes to 1 hour | 75°F to 85°F |
By controlling the proofing temperature and time, you can make bread less dense. Follow these guidelines for optimal proofing and enjoy light, fluffy bread.

Credit: theflavorbells.com
Baking Techniques
Understanding the right baking techniques can make your bread less dense. The process involves proper oven temperature and creating steam in the oven. Let’s explore these techniques further.
Oven Temperature
Maintaining the correct oven temperature is crucial. A too-low temperature can make bread dense. The ideal range is usually between 375°F and 425°F.
- Preheat your oven for at least 20 minutes.
- Use an oven thermometer to ensure accuracy.
- Bake bread in the middle rack for even heat distribution.
Check the bread’s internal temperature. It should reach around 190°F to 200°F.
Steam In The Oven
Creating steam in the oven helps the bread rise. It also makes the crust crispy. Here are some easy ways to add steam:
- Place a pan of hot water in the bottom of the oven.
- Mist the oven walls with water before baking.
- Use a baking stone, as it holds heat and adds steam.
Be careful when opening the oven door. Steam can burn you.
Enhancing Flavor And Texture
Making bread less dense can be a game-changer. It can greatly enhance both the flavor and texture of your bread. There are several techniques to achieve this, and they are simpler than you might think. In this section, we’ll cover two effective methods: Adding Fats and Using Natural Ferments.
Adding Fats
Adding fats to your bread dough can significantly improve its texture. Fats like butter, olive oil, or even milk can make your bread softer and lighter.
- Butter: Adds a rich flavor and softens the crumb.
- Olive Oil: Makes the dough more elastic and easier to handle.
- Milk: Adds moisture and can make the bread softer.
Here is a simple table to show the effect of different fats:
| Fat Type | Effect on Bread |
|---|---|
| Butter | Rich flavor, soft crumb |
| Olive Oil | Elastic dough, lighter texture |
| Milk | Moist and soft |
Using Natural Ferments
Natural ferments like sourdough starter can greatly improve bread. They not only make the bread less dense but also add a unique flavor.
- Sourdough Starter: Adds a tangy flavor and airy texture.
- Poolish: A pre-ferment that gives a light and airy crumb.
- Biga: Adds complexity and lightness to the bread.
Using natural ferments can make your bread healthier. They help in better digestion and add nutritional value.

Credit: www.busbysbakery.com

Credit: juliasalbum.com
Frequently Asked Questions
What Causes Bread To Be Dense?
Dense bread often results from insufficient kneading or not enough yeast. Proper kneading develops gluten structure.
How Can I Make Bread Lighter?
To make bread lighter, ensure proper kneading and allow sufficient time for dough to rise.
Why Is My Homemade Bread Dense?
Homemade bread can be dense due to overmixing or not enough rising time. Ensure correct yeast amount.
How Does Yeast Affect Bread Density?
Yeast makes bread rise by producing gas. Insufficient yeast leads to denser bread.
What Is The Best Flour For Light Bread?
Bread flour is ideal for light, airy bread. It has higher protein content, which improves gluten development.
Can Overproofing Make Bread Dense?
Yes, overproofing can collapse the dough, resulting in dense bread. Keep an eye on rising times.
Conclusion
Mastering the art of making bread less dense is achievable with practice. Use fresh ingredients and proper techniques. Experiment with hydration levels and kneading methods. Always allow sufficient proofing time. Soon, you’ll enjoy light, fluffy homemade bread. Keep baking and refining your skills for perfect results every time.
