

Using a kitchen timer can help achieve perfect cooking results. It ensures you don’t overcook or undercook your meals.
Cooking can be an art, but precise timing is essential to get it right every time. A kitchen timer is a simple yet powerful tool that can transform your cooking experience. Whether you’re a seasoned chef or a beginner, knowing how to use a kitchen timer effectively can make a big difference.
This guide will walk you through the steps to use a kitchen timer for perfect cooking. We’ll cover why it’s important, how it helps, and tips to get the most out of it. With this knowledge, you’ll find cooking more enjoyable and less stressful.

Credit: www.amazon.com
Choosing The Right Timer
Choosing the right kitchen timer can make a big difference in your cooking. With the right timer, you can ensure your dishes are cooked to perfection. But how do you pick the right one? Let’s explore some options and features to consider.
Digital Vs. Analog
Digital timers are modern and easy to use. They often come with large displays and multiple functions. You can set them with precision down to the second. Digital timers are great for complex recipes.
Analog timers are simple and reliable. They have a classic look and feel. You set them by turning a dial. Analog timers are less likely to fail due to battery issues. They are perfect for straightforward cooking tasks.
Features To Consider
Consider the size of the timer display. A large display is easier to read. This is important when you have your hands full. Backlit displays are helpful in low-light conditions.
Look for timers with loud alarms. You need to hear it over kitchen noise. Adjustable volume can be a useful feature. Choose a timer with a clip, magnet, or stand. This adds convenience and keeps it within reach.
Some timers have multiple countdown settings. This is useful for multitasking. Timer memory functions can save your most-used settings. Auto-shutoff features can help save battery life.
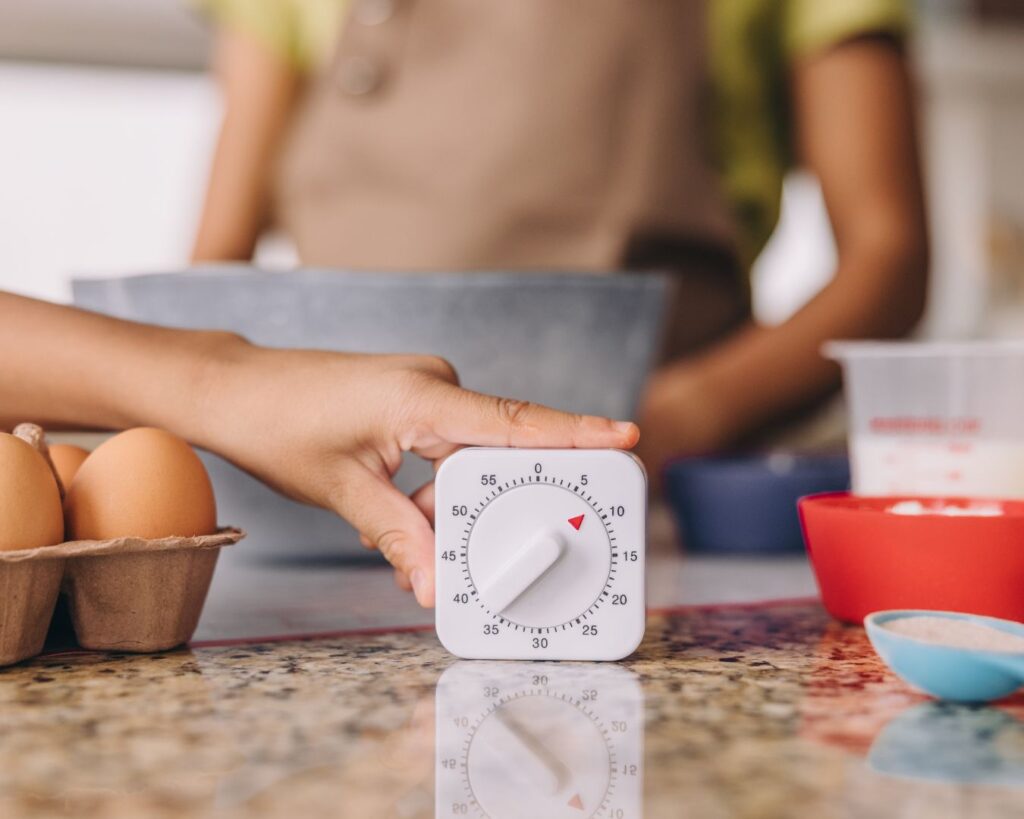
Setting Up Your Timer
Hey friends, today I’ll show you how to set up your kitchen timer for perfect cooking. Setting up your timer is the first step to ensuring your food is cooked to perfection. Let’s dive into the simple steps to get you started.
Reading The Instructions
First things first, grab your kitchen timer and the instruction manual. I know, reading manuals can be boring. But trust me, it’s worth it. The good news? It’s usually just a few pages.
- Check for any special features.
- Understand the basic functions.
- Note any warnings or tips.
For example, I once tried to use a timer without reading the manual. Big mistake. I ended up overcooking my pasta. So, take a few minutes to read through it.
Installing Batteries
Most kitchen timers run on batteries. Here’s how to install them:
- Find the battery compartment. It’s usually at the back.
- Open the compartment. You might need a small screwdriver.
- Insert the batteries. Check the positive and negative ends.
- Close the compartment securely.
Easy, right? Make sure the batteries are fresh. Old batteries can cause the timer to malfunction. And that’s the last thing you want when you’re cooking.
Once your batteries are in, your timer is ready for action. The next step? Setting the timer correctly. But we’ll get into that next time. Happy cooking!
Timing Techniques
Hey friends, today I’ll show you how to use a kitchen timer for perfect cooking. Timing is everything when it comes to making great food. Whether you’re baking cookies or roasting a chicken, a good timer can be your best friend. Let’s explore some timing techniques to make your cooking easier and more precise.
Pre-set Intervals
Using pre-set intervals is like having a cooking assistant. Many kitchen timers come with pre-set options for common cooking tasks. For example, you might have intervals for boiling eggs or baking a cake. These pre-sets take the guesswork out of cooking.
Here’s how you can use them:
- Check the manual: Look at the timer’s manual to see what pre-sets are available.
- Select the interval: Choose the right interval for your task.
- Start cooking: Once you set the timer, start cooking and wait for the beep.
Using pre-sets can help you avoid overcooking or undercooking food. It’s like having a little chef in your kitchen. So, next time you’re in the kitchen, give those pre-sets a try. They might just save your meal.
Manual Adjustments
Sometimes, the pre-set intervals won’t match what you need. This is where manual adjustments come in handy. You can set the timer for exactly the amount of time you think is needed. Here’s a step-by-step guide:
- Assess your recipe: Look at how long your recipe says to cook the food.
- Set the timer: Manually set the timer to the recommended time.
- Keep an eye on your food: Check your food as it cooks to ensure it is not overcooked or undercooked.
Making manual adjustments allows you to have more control. It’s like being the captain of your own ship. You decide how long to cook the food, so you get it just right.
Remember, practice makes perfect. The more you use your timer, the better you’ll get at judging the right cooking times. And soon, you’ll be cooking like a pro, even if you’re just starting out.
Credit: cosmoappliances.com
Multi-tasking With Timers
Multi-tasking in the kitchen can be tricky. Juggling multiple dishes and cooking times is a challenge. A kitchen timer can be a lifesaver. It helps you manage tasks and keep track of cooking times. This ensures each dish is cooked to perfection.
Managing Multiple Dishes
Cooking several dishes at once? A timer can help. Set individual timers for each dish. This helps you stay organized. You will know exactly when to check on each one. No more guessing or forgetting a dish in the oven.
Avoiding Overlaps
Timers help avoid overlaps in cooking times. Start with the dish that takes the longest. Set the timer. Then move on to the next dish. Set another timer. This way, each dish gets the attention it needs. No more burnt or undercooked food.
Using Timers For Baking
Using a kitchen timer for baking is essential for success. Baking requires precision and careful timing. A kitchen timer helps you stay on track and avoid mistakes. From measuring ingredients to cooling times, a timer is your best friend. Let’s explore how to use a timer effectively while baking.
Precise Measurements
Accurate measurements are crucial in baking. Use a timer to ensure you mix ingredients for the right amount of time. Under or over-mixing can affect the texture and taste. Set your timer for each step. This ensures you follow the recipe exactly.
Cooling Times
Cooling times are as important as baking times. Set a timer to remind you when to check your baked goods. Proper cooling prevents overcooking and helps maintain texture. A timer also helps you avoid burning yourself by reminding you to wait before handling hot items.
Timers For Stovetop Cooking
Hey friends, today let’s talk about how to use a kitchen timer for perfect cooking. One of the best ways to use a timer is for stovetop cooking. It helps you keep track of time and ensures your food is cooked just right. Whether you are simmering a delicious soup, boiling pasta, sautéing vegetables, or frying chicken, a timer is your best friend. Let’s break it down.
Simmering And Boiling
Simmering and boiling are common cooking techniques. But it’s easy to lose track of time. I remember once leaving my pasta on the stove and it turned to mush! To avoid this:
- Set your timer when the water starts boiling. For pasta, it’s usually 8-12 minutes.
- Simmering soups or stews? Set the timer for 30 minutes to an hour, depending on your recipe. This will help you keep an eye on it without constantly watching the pot.
- Check periodically. When the timer goes off, check your food. If it needs more time, reset the timer in 5-minute increments. This way, you won’t overcook.
Sautéing And Frying
Sautéing and frying require quick timing and attention. It’s easy to get distracted and burn your food. Here’s how to use your timer effectively:
- Preheat your pan. Set the timer for 2-3 minutes to preheat. This prevents food from sticking.
- Cooking times. For vegetables, sauté for 5-7 minutes. For chicken or meat, it might take 10-15 minutes. Use the timer to track these times.
- Flip or stir. Set the timer to remind you to flip or stir your food. For instance, flip chicken every 5 minutes. This ensures even cooking.
Using a kitchen timer can make a huge difference in your cooking. It helps you manage your time and cook with confidence. Next time you’re at the stove, remember to set your timer and enjoy perfectly cooked meals!
Advanced Timer Techniques
Hey friends, today we’re diving into some advanced timer techniques for cooking. If you’ve ever struggled to get your meals just right, don’t worry. You’re not alone. Learning to use a kitchen timer can make a huge difference. Let’s explore how to make the most of this handy tool.
Programming Multiple Steps
Cooking a great meal often means juggling several tasks at once. Sometimes, you need to cook different ingredients at different times. This is where programming multiple steps comes in handy. Think of it like a dance routine – each step has its own time and place.
Here’s how you can do it:
- Set the first timer: Start with the ingredient that takes the longest. Set your timer and begin cooking.
- Add the next step: When the first timer beeps, add the next ingredient. Set another timer for this step.
- Repeat: Continue this process until all your ingredients are cooking perfectly together.
Example: You’re making a stew. Set a timer for the meat first. When it’s done, add the vegetables and set another timer. Easy!
Using Countdown Timers
Countdown timers are like your kitchen’s personal alarm clock. They help you keep track of time so you don’t overcook or burn your food. Trust me, I’ve been there!
Here’s a simple way to use them:
- Set the timer: Decide how long your food needs to cook. Set your timer for that amount of time.
- Check your food: When the timer goes off, check your food. If it needs more time, set the timer again.
- Repeat if necessary: Keep adjusting until your food is just right.
The good news? Using a countdown timer is as easy as setting an alarm on your phone. You’ll get the hang of it in no time.
Advanced timer techniques can take your cooking to the next level. With a bit of practice, you’ll be timing your meals like a pro. Happy cooking!

Credit: www.amazon.com
Troubleshooting Timer Issues
Cooking with a kitchen timer can be a lifesaver. It ensures your meals cook perfectly every time. But what happens when the timer malfunctions? Troubleshooting timer issues can help you avoid burnt or undercooked food.
Common Problems
Kitchen timers sometimes face common issues. They may not start or stop correctly. The display might freeze or show errors. The timer might not alarm at the set time. Understanding these problems can help you find solutions faster.
Quick Fixes
Many timer issues have simple solutions. If the timer doesn’t start, check the batteries. Replace them if needed. Ensure the timer is set correctly. Reset the device if the display freezes. Unplug it, wait a few seconds, then plug it back in.
For timers that don’t alarm, check the volume settings. Increase the sound if it’s too low. Clean the timer if it seems dirty. Dust and grime can affect its performance. Regular maintenance can prevent many of these issues.
Frequently Asked Questions
How To Use A Kitchen Timer?
Set the desired time on the kitchen timer. Press start. The timer counts down and alerts you when time’s up.
Do Professional Kitchens Use Timers?
Yes, professional kitchens use timers. They ensure precise cooking times, improve efficiency, and maintain consistency in dish preparation.
What Is The Difference Between Cooking Time And Kitchen Timer On Oven?
Cooking time sets the duration for the oven to cook food. The kitchen timer only tracks time but doesn’t control the oven.
How To Set A Digital Kitchen Timer?
To set a digital kitchen timer, press the “Timer” button. Use the “+” and “-” buttons to adjust the time. Press “Start” to begin the countdown.
Conclusion
Using a kitchen timer makes cooking easier and more precise. It helps prevent overcooking and undercooking. Set the timer, follow your recipe, and enjoy perfectly cooked meals. It’s a small tool with a big impact on your cooking results. Practice with it, and soon you’ll notice a difference.
Your dishes will taste better and your kitchen routine will improve. Remember, a kitchen timer is your friend in achieving great cooking outcomes. Happy cooking!